landsharks air conditioning overhaul
Moderators: GRNSHRK, ron, bfons
-
hornhospital

- Platinum Member

- Posts: 2940
- Joined: Sun Jul 11, 2010 6:46 pm
- Location: Silverhill, AL
- Contact:
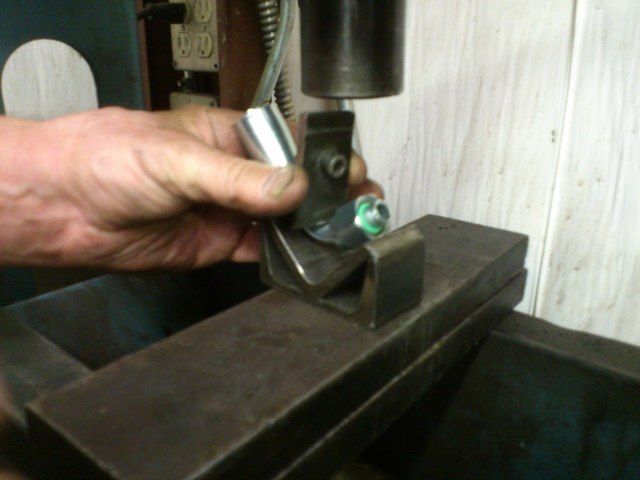
Gutsy repair, Jose. I tell people learning to TIG aluminum that if they see it melt before applying filler rod, it's already too hot and it generally drops a big blob out of the base metal they were trying to weld. Using Alumi-Weld I've found the resulting weld is many times harder than the base metal, making machining and drilling/tapping a lot more difficult. Do-able, but not like working with aluminum itself. But it does work! Viable alternative to TIG welding if the joint strength isn't critical. What you are doing is die-casting the threads, using a bolt as the die. Very clever. 
Ken Kanne
'84 633CSi "Sylvia"; '85 635CSi "Katja";'85 325e "Hazel Ann"; '95 M3 "Ashlyn"
'84 633CSi "Sylvia"; '85 635CSi "Katja";'85 325e "Hazel Ann"; '95 M3 "Ashlyn"

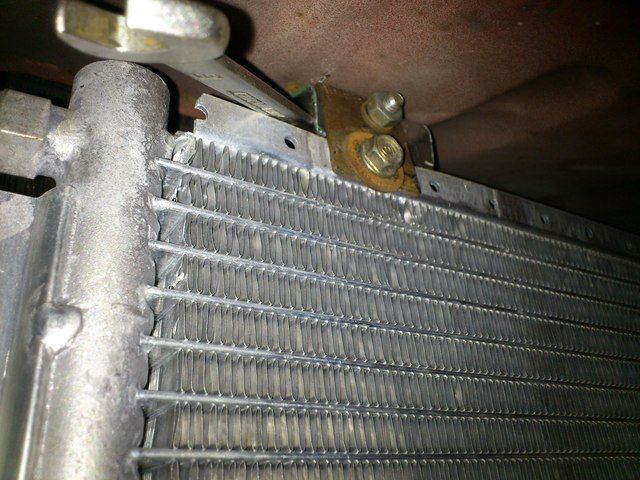
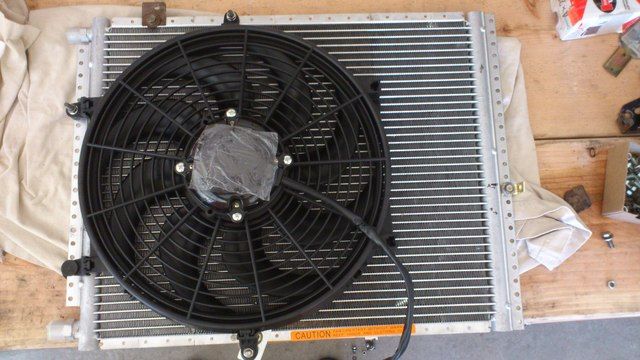
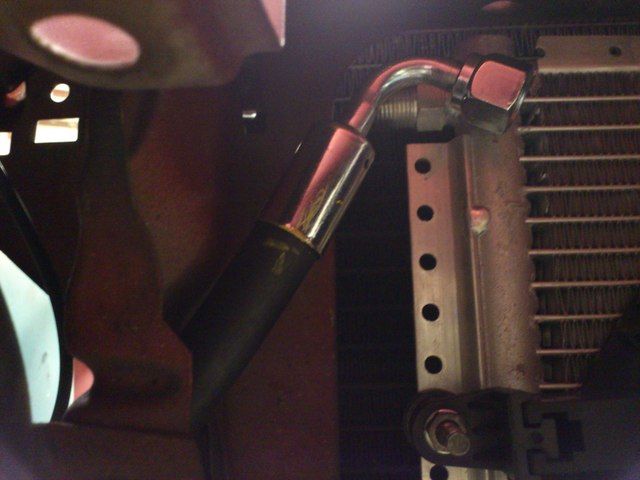
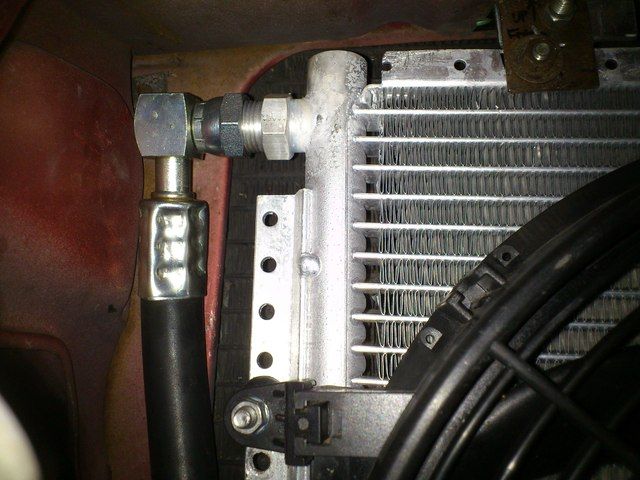
Pictured is the top of the condenser. I don't have a problem hacking and slashing this car, but when it comes to easily visible stuff, I'm not drilling extra holes that can be seen when the hood is open. One bracket mounts to the car, the other to the condenser. I then install a union bolt (upper one in picture) for somewhat easy assembly. I should get to plumbing fairly soon.
I talked with a first fiver who did a conversion similar to mine and he say he runs castor oil with R-134a. Never touched the expansion coil or evaporator, and the retrofitted system has been fine for at least 10 years. Isn't that something?
I talked with a first fiver who did a conversion similar to mine and he say he runs castor oil with R-134a. Never touched the expansion coil or evaporator, and the retrofitted system has been fine for at least 10 years. Isn't that something?

Karmann, German for extra rusty.
Brackets for the condenser and reworked bracket for the oil cooler are done. Im having a hell of a time too. Space is limited and the condenser is already butted up against the driver side cavity wall to make space for the side pictured. The condenser is very light and I only went with 3 sturdy brackets all with m6 bolts or bigger. I think im ready for plumbing and a new electric fan.
Just an update, my contact said he used Ester oil for his conversion. 185 mL of BVA Auto 100 oil (ISO 100 viscosity, POE)
Just an update, my contact said he used Ester oil for his conversion. 185 mL of BVA Auto 100 oil (ISO 100 viscosity, POE)
Karmann, German for extra rusty.


Very nice Landshark. Can you get pics of the core mounting brackets and how you had to attach them to the car? (I know it's pretty tight in there). Also, what size fittings are on each end of the hoses? Would you stay with the same size core next time or an inch narrower to have more room for the lines?
When you're done it would be great to have a few details in a note to help the next guy save some time:
What hose ends are needed, sizes and type, for compressor and condenser.
What hose to buy... type, sizes and lengths, and maybe a convenient source.
Compressor bracket mods and which compressor etc...
Feel like I'm looking a gift horse in the mouth...
Many thanks!!
'87 635csi, 5sp man, dk blu on pearl beige
'88 635csi, auto, black on grey
'63 BMW Isetta
'75 XJ6C, 2dr, warm 350
'86 XJ6, th700r4
'75TR6
'64 Olds 88 conv
"68 T120 Bonneville
'88 635csi, auto, black on grey
'63 BMW Isetta
'75 XJ6C, 2dr, warm 350
'86 XJ6, th700r4
'75TR6
'64 Olds 88 conv
"68 T120 Bonneville

Years ago I bought some alumiweld rods at the NY Boat Show with the aluminum wire brush (they said the steel wire brush makes it impossible to weld because of the iron contamination) Never been able to get it to work properly.hornhospital wrote:Gutsy repair, Jose. I tell people learning to TIG aluminum that if they see it melt before applying filler rod, it's already too hot and it generally drops a big blob out of the base metal they were trying to weld. Using Alumi-Weld I've found the resulting weld is many times harder than the base metal, making machining and drilling/tapping a lot more difficult. Do-able, but not like working with aluminum itself. But it does work! Viable alternative to TIG welding if the joint strength isn't critical. What you are doing is die-casting the threads, using a bolt as the die. Very clever. =D>
Sansouci
84 E24 633Csi Auto, Bronzit/PearlBeige 6997510
93 E32 740il M60 Auto, Alpenweis/Ultramarine
60 528i M30 5-speed Green/Beige (crushed)
71 240Z 4-speed White/Blue (rusty & sold)
65 396 Chevelle 4-speed, Marina Blue/Black (stolen)
84 E24 633Csi Auto, Bronzit/PearlBeige 6997510
93 E32 740il M60 Auto, Alpenweis/Ultramarine
60 528i M30 5-speed Green/Beige (crushed)
71 240Z 4-speed White/Blue (rusty & sold)
65 396 Chevelle 4-speed, Marina Blue/Black (stolen)
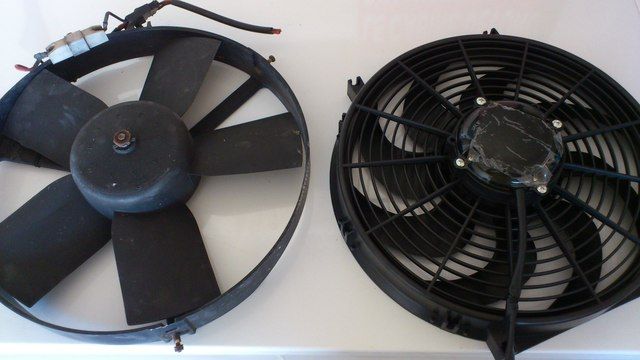
This new condenser fan from Jegs is noticeably lighter. 13 inch universal. It feels good to throw more 70's tech in the garbage can. I even went to the store and splurged on extra rubber iso spacers. Slathered the bolts in blue loctite. The fan came with these cheesy plastic cable strap things. I actually used one for one corner.
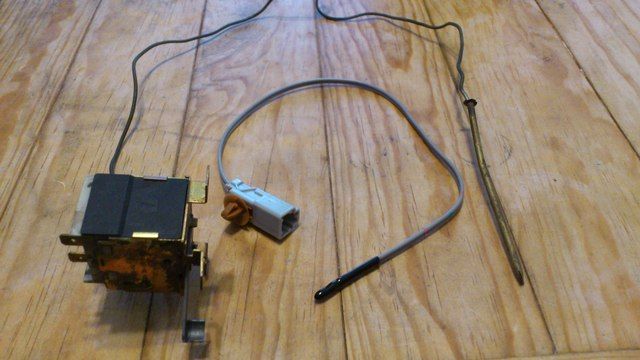
Evaporator probe will be a Made in Japan Honda/Acura part. Gut.
Evaporator probe will be a Made in Japan Honda/Acura part. Gut.


Karmann, German for extra rusty.
You're gonna put the temp probe in the evaporator?LandShark wrote:This new condenser fan from Jegs is noticeably lighter. 13 inch universal. It feels good to throw more 70's tech in the garbage can. I even went to the store and splurged on extra rubber iso spacers. Slathered the bolts in blue loctite. The fan came with these cheesy plastic cable strap things. I actually used one for one corner.
Evaporator probe will be a Made in Japan Honda/Acura part. Gut.
'87 635csi, 5sp man, dk blu on pearl beige
'88 635csi, auto, black on grey
'63 BMW Isetta
'75 XJ6C, 2dr, warm 350
'86 XJ6, th700r4
'75TR6
'64 Olds 88 conv
"68 T120 Bonneville
'88 635csi, auto, black on grey
'63 BMW Isetta
'75 XJ6C, 2dr, warm 350
'86 XJ6, th700r4
'75TR6
'64 Olds 88 conv
"68 T120 Bonneville
Yes, you're right! Thermal breaker not fan control, I stand corrected. :)LandShark wrote:The evaporator probe or "thermal breaker" hovers inside or near the evaporator so it doesnt ice over. If the evap gets too cold, it temporarily breaks the circuit to the compressor clutch. Did I get that right? My fan will still be controlled manually.
'87 635csi, 5sp man, dk blu on pearl beige
'88 635csi, auto, black on grey
'63 BMW Isetta
'75 XJ6C, 2dr, warm 350
'86 XJ6, th700r4
'75TR6
'64 Olds 88 conv
"68 T120 Bonneville
'88 635csi, auto, black on grey
'63 BMW Isetta
'75 XJ6C, 2dr, warm 350
'86 XJ6, th700r4
'75TR6
'64 Olds 88 conv
"68 T120 Bonneville
This is the original Ranco thermal breaker. It seems to be working great by bench checking it in the freezer. The Honda part follows a different digital logic with a range of ohms that just won't work without designing a bulky circuit and relay, etc.
My new main problem is that I think I need to flip my condenser over, so that hot gas from the compressor enters the top larger port and leaves as a liquid at the bottom. Please provide input on this matter, as I have seen many diagrams where the condensed liquid leaves at the bottom.
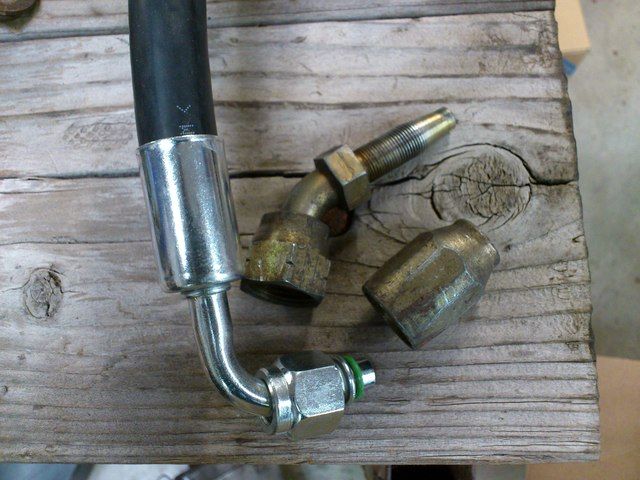
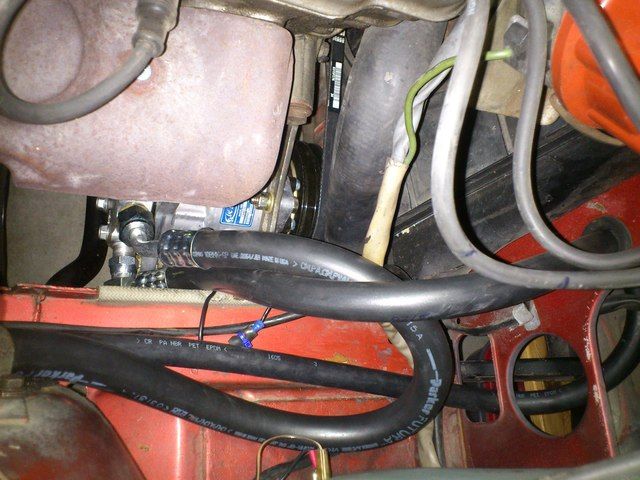
Also, I was able to reuse the original aeroquip style fittings by shaving some outside material off of the new barrier hoses.


Karmann, German for extra rusty.

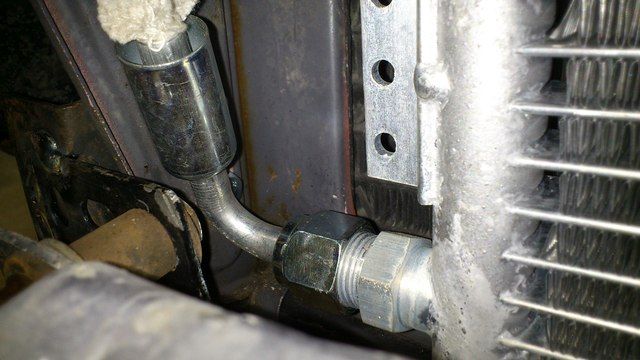
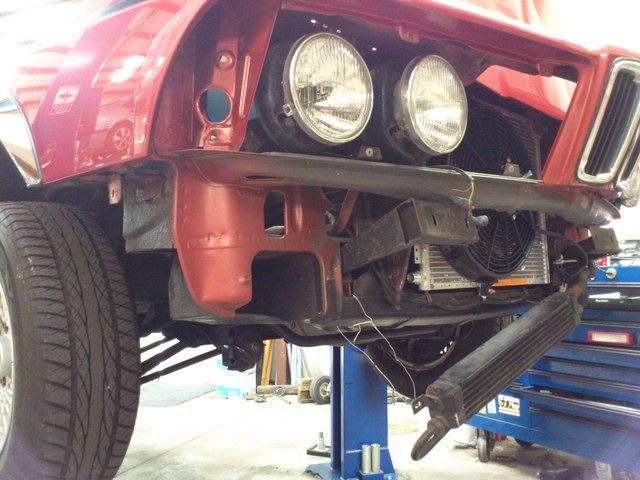
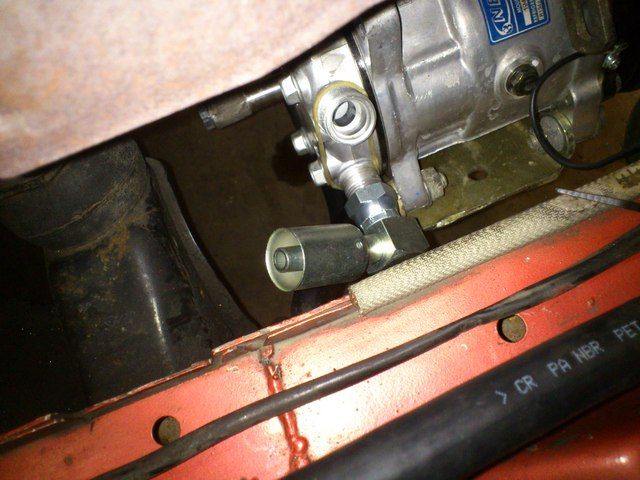
The true width of this condenser is 21.5 inches with the integrated bracket bars. Yes, it was trouble working out the closeness of the brackets and hoses. Yes, I am finally finished plumbing it. I needed two short drop 90 degree elbows on the condenser and compressor (pictured) just to make it fit. One hose to go and then we oil, charge, and possibly feel chilly.

Karmann, German for extra rusty.
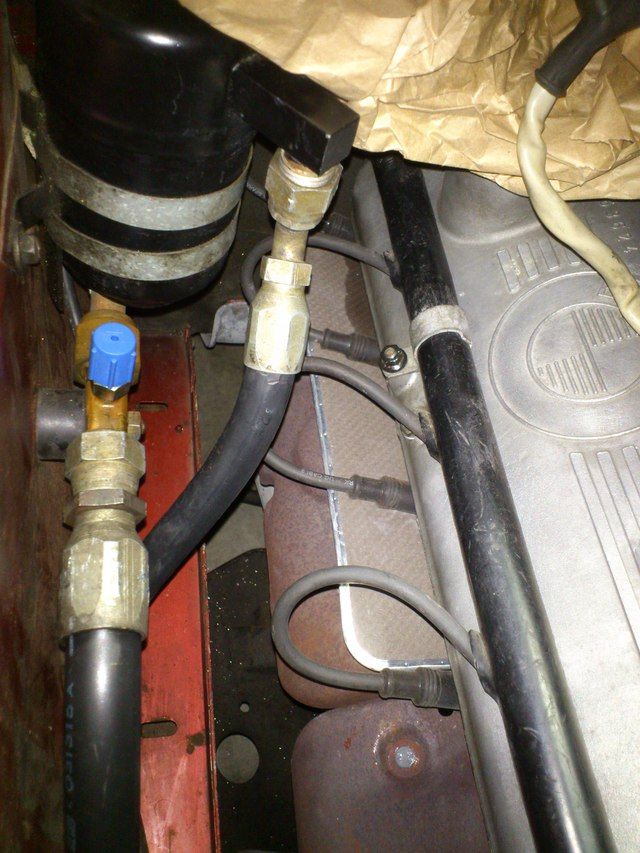
All done. We got the system on vacuum for 30 minutes, then on pressure check. One crimp needed to be recrimped at a different clock in order to seal up a leak. There was also a bad schrader valve on the retrofitted low side port. I arranged those hoses in that way where one is holding the other back without the need of more hose clamps. Some thermo wrap coming soon!


Karmann, German for extra rusty.
Re: landsharks air conditioning overhaul
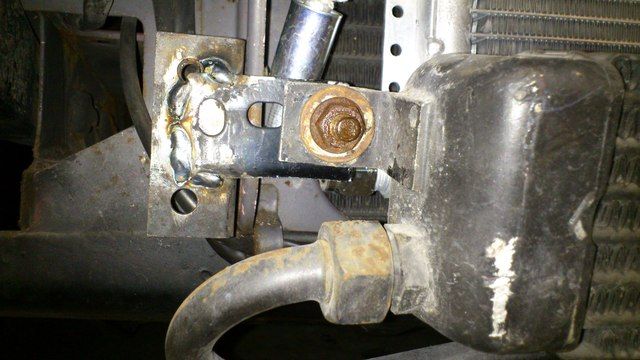
Update: I had to apply some anaerobic sealant to this low pressure junction. It's been working great for about 3 months. I simply scrubbed the brass threads with a nylon brush, cleaned with acetone, and applied the sealant.

It probably was the main source of leakage says the previous owner.

It probably was the main source of leakage says the previous owner.
Karmann, German for extra rusty.

Re: landsharks air conditioning overhaul
Matthew, it was great to see the car again. Your car is in great shape, and it's great you are fixing the little details. We should have some photos of you heading up the pass.
http://www.Drive4Corners.com

'79 635CSi Revival
'80 635CSi
'83 633CSi Callaway Turbo continued as 1988 535is Turbo
SOLD: '81 635CSi/A
'79 635CSi Revival
'80 635CSi
'83 633CSi Callaway Turbo continued as 1988 535is Turbo
SOLD: '81 635CSi/A
-
songzunhuang
- Platinum Member
- Posts: 1224
- Joined: Fri Aug 14, 2015 10:04 am
- Location: Silicon Valley, CA
- Contact:
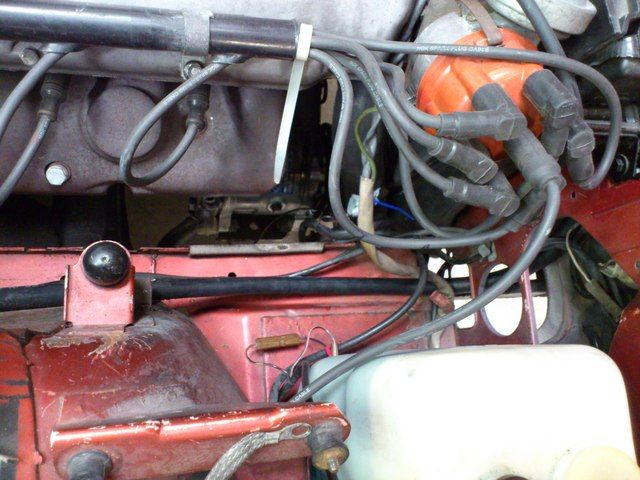
Relocated the receiver/dryer?
Ok, I just got back from a hose shop and without custom fabricating hardlines, there's no way to make the new parts (Sanden compressor and parallel flow condenser) fit.
I noticed in the pictures on this thread that there are no hardliners. Also it looks like the receiver / dryer was moved and mounted with a metal strap. Am I seeing this correctly? I don't see how else to do this.
I hope someone sees this and can verify. I'm kinda stuck until I can figure this out.
I noticed in the pictures on this thread that there are no hardliners. Also it looks like the receiver / dryer was moved and mounted with a metal strap. Am I seeing this correctly? I don't see how else to do this.
I hope someone sees this and can verify. I'm kinda stuck until I can figure this out.
-----
Song Huang
1984 633CSi
Last 7 of VIN: 6997383
Song Huang
1984 633CSi
Last 7 of VIN: 6997383

Re: landsharks air conditioning overhaul
My car has its original hard lines, but the hose sections have been replaced with modern barrier hose. The old crimped ends are cut off (just the collar) and a new collar is crimped over the end of the old hard line.
For example:
http://www.tbiproducts.com/index.cfm/pa ... /prd77.htm
Try another hose shop.
For example:
http://www.tbiproducts.com/index.cfm/pa ... /prd77.htm
Try another hose shop.
Dean
Lutz, FL
'85 635 CSi Euro #9402254
'87 Spider Veloce
'92 Spider Veloce
'08 350Z

Lutz, FL
'85 635 CSi Euro #9402254
'87 Spider Veloce
'92 Spider Veloce
'08 350Z
-
songzunhuang
- Platinum Member
- Posts: 1224
- Joined: Fri Aug 14, 2015 10:04 am
- Location: Silicon Valley, CA
- Contact:
Re: landsharks air conditioning overhaul
Oh, I didn't know you could reuse them. Good info. However, given the tight quarters of my installation, I may elect to move the receiver / dryer and then use hoses instead of hard lines. My car has what looks like a charcoal canister in the way of the access holes right under the headlight.dwcains wrote:My car has its original hard lines, but the hose sections have been replaced with modern barrier hose. The old crimped ends are cut off (just the collar) and a new collar is crimped over the end of the old hard line.
For example:
http://www.tbiproducts.com/index.cfm/pa ... /prd77.htm
Try another hose shop.
You can see it in the picture below. Front of the car is up top.
- Canister to the left of the receiver/dryer blocks access holes.
- Screen Shot 2017-06-26 at 6.02.41 PM.png (1.35 MiB) Viewed 7510 times
-----
Song Huang
1984 633CSi
Last 7 of VIN: 6997383
Song Huang
1984 633CSi
Last 7 of VIN: 6997383
Re: landsharks air conditioning overhaul
Song,
Is that the activated charcoal filter 16121108967 in the realoem fuel diagram? I think it is plumbed all the way back to the tank. So you may be able to move it out of the way as you plumb your receiver dryer.....
Is that the activated charcoal filter 16121108967 in the realoem fuel diagram? I think it is plumbed all the way back to the tank. So you may be able to move it out of the way as you plumb your receiver dryer.....
Sansouci
84 E24 633Csi Auto, Bronzit/PearlBeige 6997510
93 E32 740il M60 Auto, Alpenweis/Ultramarine
60 528i M30 5-speed Green/Beige (crushed)
71 240Z 4-speed White/Blue (rusty & sold)
65 396 Chevelle 4-speed, Marina Blue/Black (stolen)
84 E24 633Csi Auto, Bronzit/PearlBeige 6997510
93 E32 740il M60 Auto, Alpenweis/Ultramarine
60 528i M30 5-speed Green/Beige (crushed)
71 240Z 4-speed White/Blue (rusty & sold)
65 396 Chevelle 4-speed, Marina Blue/Black (stolen)