Thanks 007, I will print this info out so I can comb thru it.Tinkerer007 wrote:This site may help with pin outs.
http://www.m535i.org/officers/ra/38.html#44
It explains how to connect a E34 M5 engine harness in an E28.
1985 Euro Resto Blog
Moderators: GRNSHRK, ron, bfons
UPDATE OCT 5th
Yesterday, I took an hour or so out of the day to install the clutch and brake pedal. The second time around was pretty easy. In the process I almost knock myself out! I was wrenching and the rachet slipped off the nut and my forehead got in the way. I did not get a headache but it sure hurt like hell! it was a little bloody but no stitches necessary. Needless to say I got a nice little knot in the process.
I was a little bored today looking for something to do and was going thru my parts bin. I came across my Autometer NV gauges I had in my Saab convertible. I MUST install these! I had them up for sale awhile back and got no nibbles so I'm going use them. In the process I decided to brighten up my dash with these vinyl overlays. Hmm, I gotta go back in there and color those needles florescent orange. That will work! Adds a nice little contrast to an all black interior. These should pop out at ya! Now I gotta get rid of that amber lighting (plexiglass) and put in a green one.
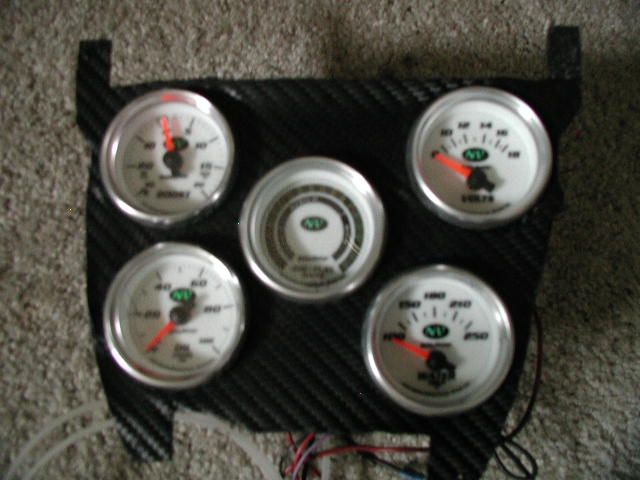
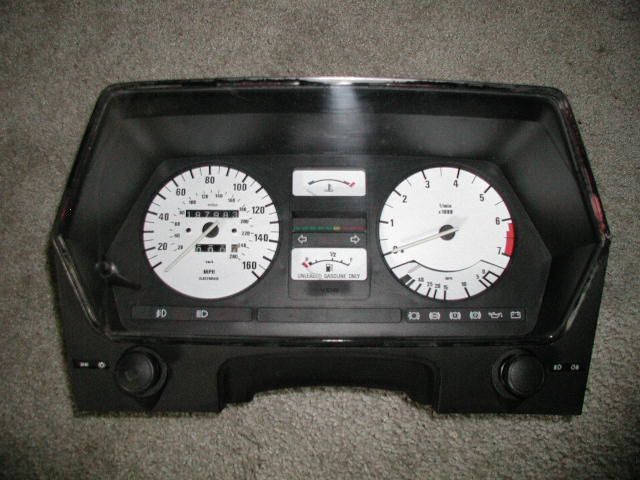
I was a little bored today looking for something to do and was going thru my parts bin. I came across my Autometer NV gauges I had in my Saab convertible. I MUST install these! I had them up for sale awhile back and got no nibbles so I'm going use them. In the process I decided to brighten up my dash with these vinyl overlays. Hmm, I gotta go back in there and color those needles florescent orange. That will work! Adds a nice little contrast to an all black interior. These should pop out at ya! Now I gotta get rid of that amber lighting (plexiglass) and put in a green one.
UPDATE OCT6th, 2012
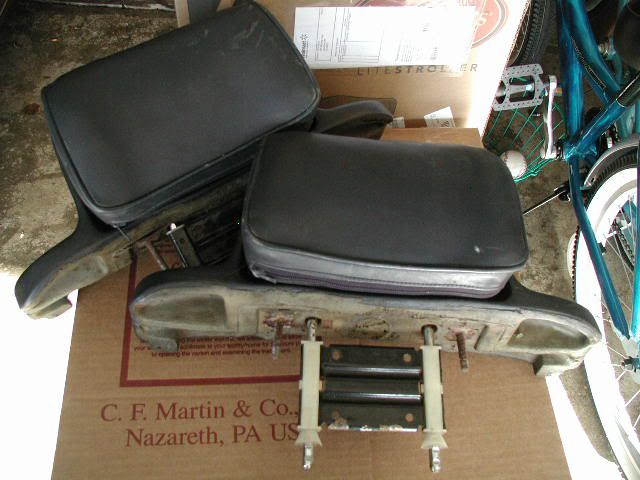
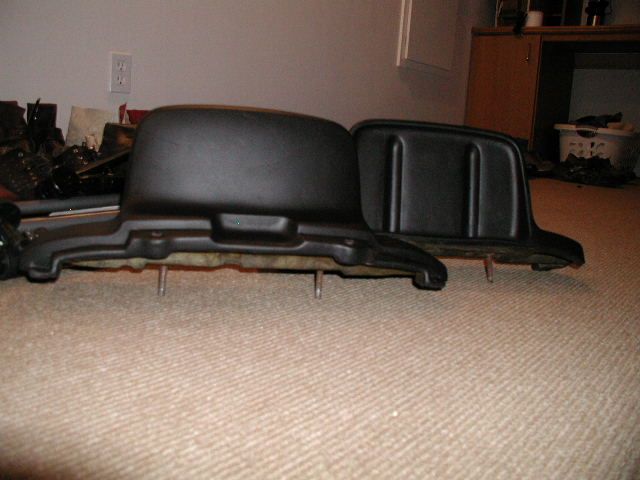
I went over the interior parts and hit them up with a flat black (satin) dye. The factory black starting looking a bit cheesy on the upper panels after dyeing the rear headrests. In addition to that the color was off a bit and was too shiny after a bit of dressing. Down the slippery slope once more, I had to touch up everything except the leather parts of course. They came out pretty damn good! The before shots looks a bit dark, they are actually Pacific blue.
Before
After
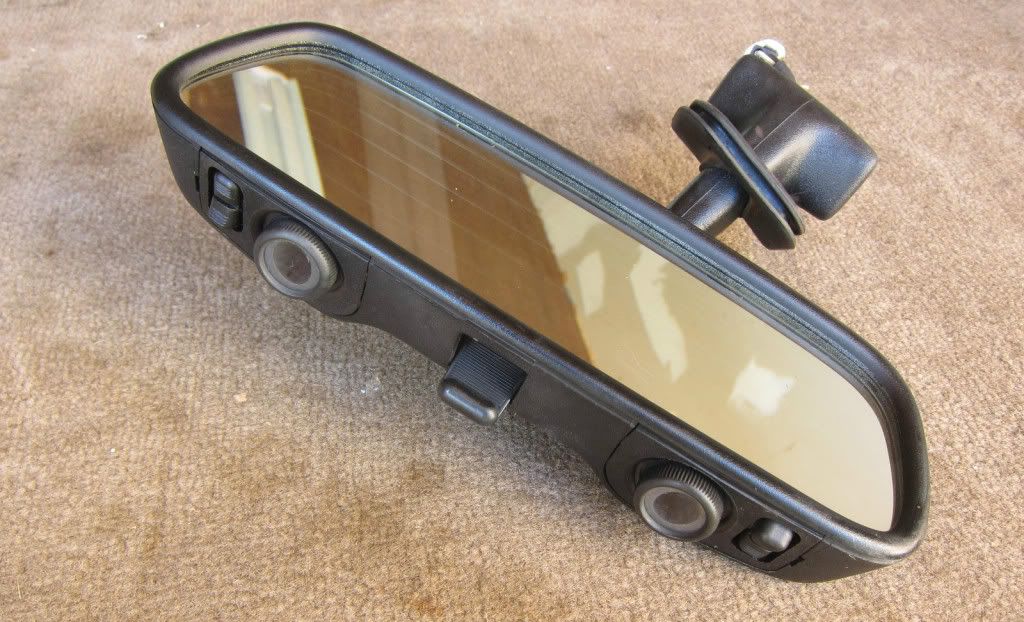
I also snagged a E30 rear mirror with the map lights. That was a nice score.
Before
After
I also snagged a E30 rear mirror with the map lights. That was a nice score.
OCT17th Update:
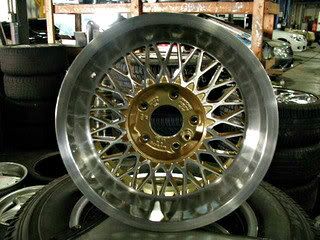
I dropped by Wheel Medic to see how things were going and I must say I am thrilled with the results...$$$ cha-ching $$$. The wheels are looking lovely. The center caps were being worked on and the wheels just needed the final polish before clear coat. Overall, total price of wheels cost me about $1K. This includes purchase price, shipping from Germany and refinish work.
BEFORE

AFTER
I've got all my bits and pieces together from the upper engine for sandblasting which I will take to these guys and see if I can source some stainless steel replacement nuts and bolts. I'm sliding down the slipper slope once more. Hey, I got 2 years for this project. That being said after I clayed the A6 over the weekend and spent 2 days applying various wax stages and glaze I had it looking like glass. You could not set anything on the car without it sliding off. I think I want a black 6er!
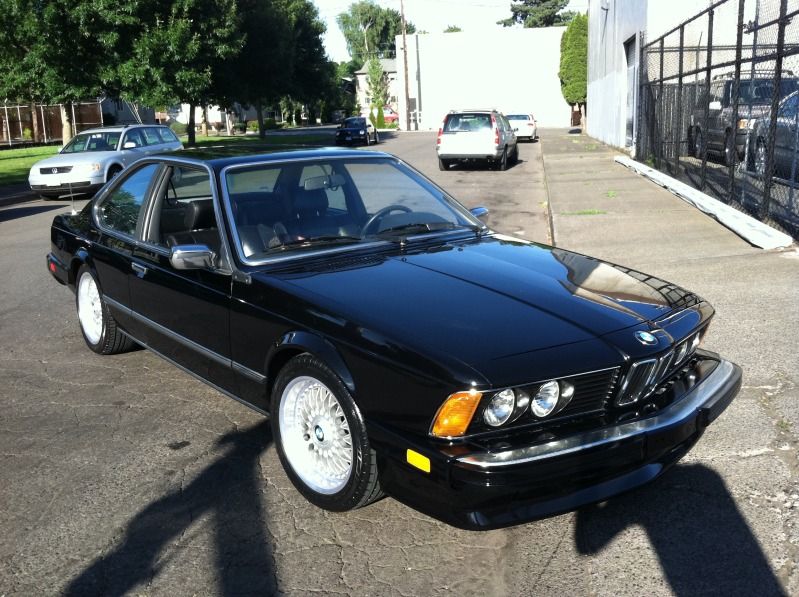
Check out this money shot! You gotta admit these cars really stand apart in certain colors. This is Muffler_bearings 6er..
I found a guy that does restoration work on classic cars and his work has been featured in magazines for Mustang restorations. He is a master painter! $$ cha-ching $$.
I got a reasonable quote from him according to my description of the car but changing colors and doing it right may be an extra grand. He will pull everything off the car..hood, doors, trunk and trim. The more I can pull off the car, the less work he has to do will save me some money. I think I need to knock on the doors of some of my debtors. I estimate this project will probably cost between $10k to $15k when its all done. I hope the value of these cars increase along with its collectability. For that price I could get a primo M6 but nothing like putting in the sweat to build your own. I probably will have more ponies than a regular M635 when done anyway which will be the ultimate sleeper surprising those M3 guys
BEFORE
AFTER
I've got all my bits and pieces together from the upper engine for sandblasting which I will take to these guys and see if I can source some stainless steel replacement nuts and bolts. I'm sliding down the slipper slope once more. Hey, I got 2 years for this project. That being said after I clayed the A6 over the weekend and spent 2 days applying various wax stages and glaze I had it looking like glass. You could not set anything on the car without it sliding off. I think I want a black 6er!
Check out this money shot! You gotta admit these cars really stand apart in certain colors. This is Muffler_bearings 6er..
I found a guy that does restoration work on classic cars and his work has been featured in magazines for Mustang restorations. He is a master painter! $$ cha-ching $$.
I got a reasonable quote from him according to my description of the car but changing colors and doing it right may be an extra grand. He will pull everything off the car..hood, doors, trunk and trim. The more I can pull off the car, the less work he has to do will save me some money. I think I need to knock on the doors of some of my debtors. I estimate this project will probably cost between $10k to $15k when its all done. I hope the value of these cars increase along with its collectability. For that price I could get a primo M6 but nothing like putting in the sweat to build your own. I probably will have more ponies than a regular M635 when done anyway which will be the ultimate sleeper surprising those M3 guys
-
kronus
I will pick them up next week on Thus or Friday. The guys did a great job. Im on the hunt for a spare or a pair of 16x9's. You're gonna luv them, the guys were complaining about how much work was involved to refinish them. I think they might charge me more money if I bring in another setkronus wrote:Bump! More updates!
I want to see your wheels on it, those are some nice rollers. Currently going through getting my car repainted, as you know, and I think it took about 8 hours to get it torn down to a drivable but stripped shape.
Got another lead to make my staggered set. Hopefully, the guy is willing to ship them to me from Germany. That would give me a a few spares or a complete set of 16x8. I'm keeping my fingers crossedkronus wrote:Bump! More updates!
I want to see your wheels on it, those are some nice rollers. Currently going through getting my car repainted, as you know, and I think it took about 8 hours to get it torn down to a drivable but stripped shape.
UDATE: Nov 16, 2012
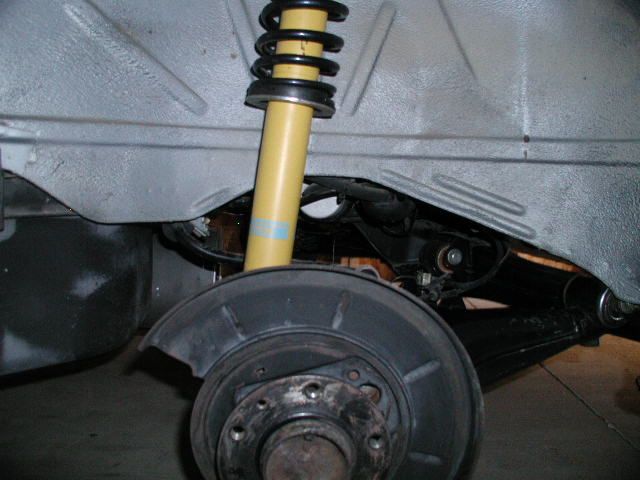
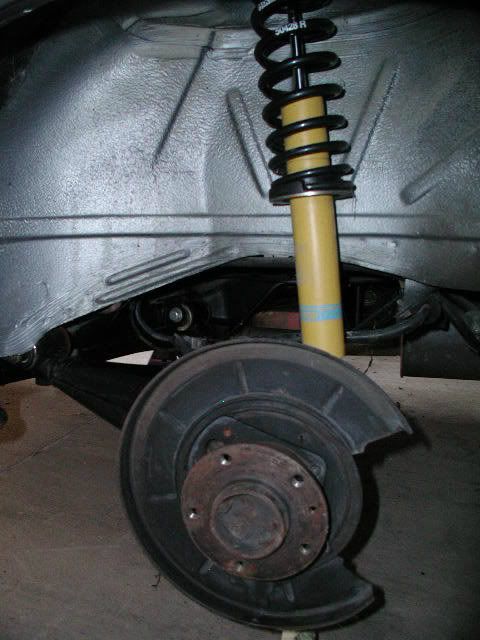
Today was a productive day! I removed front strut assembly, brake calipers all around and exhaust manifold. It took me much longer than it should have (4 hrs). For some strange reason I could not find my ratchet. I emptied my tool bag on the floor to make it easier to find. I got creative with a 17mm tire iron. Packing up to go home it appeared out of nowhere . I may need glasses sooner than anticipated! 
After pulling everything out the control assembly is in poor shape. most of the rubber on the joints are torn or showing their age. Although some parts look pretty decent I am going to replace the whole shebang. I priced some Meyle HD kit at $550
Although Ive seen others for around $250 I've learn my lesson buying inferior parts. I'll just bite the bullet on this one.
BTW I will be posting a few items for sale if anyone's interested. As you know the conversion for manual is in it early stages and parts I remove are up for grabs. All four calipers available, all four rotors practically new just some rust from sitting for who knows how long. The front pads are new but the rears have a little wear. Automatic radiator is available, high performance ignition cables from Brav Auto and a few other goodies. I will be posting pics tomorrow.
Update Nov 20, 2012
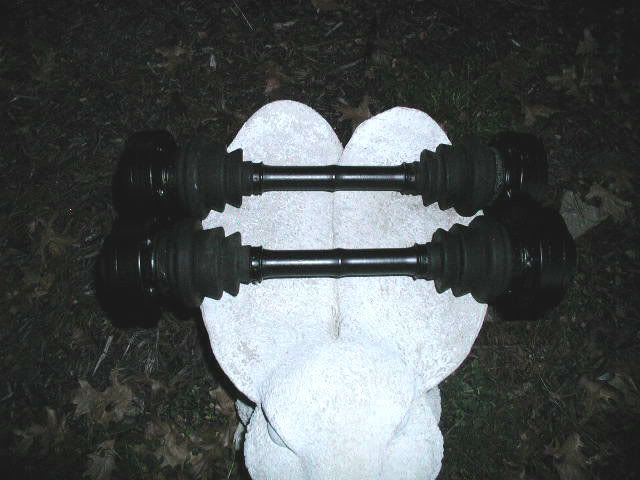
I got a little sumtin done over the weekend. While I had the front struts out I gave them a wash, scrub off some minor rust and a little paint treatment. My rear half shafts were originally out of the car so it was a no brainer to give them a touch up too. I used Rustoleum outdoor high temp for paint for grills and went over that with a rust preventive satin finish. Turned out pretty NICE! I should be receiving my 2.93 LSD after the holidays and my SS brake liines. Just hope its not too cool to touch up the rear dust sheild. This should complete my rear end to start the installation. I hope I find all the missing bolts in the container shipped with the car.

UPDATE: NOV 26th
Well, had a little time this afternoon. A whole 4hrs or was that 5? A lot could be done in 5 hrs but I don't know what the hell I'm doing.
I drained the tranny oil, removed the oil lines from the tranny to radiator, got the shifter out of the pocket and started playing with the transmission bolts. I could not reach in to remove the harness of the transmission and could not see well. There's always that one $%#$^# bolt that make you want to run to the store and find the right tool to make it easier. It did not help that I forgot my flashlight and trying to see shit in the dark with sunlight in my face did not help.
Looks like the Bentley Manual is missing some information here. Then again I am working out of a 5 series book. I could use a little input fellas to go about this. The tranny is still in the car with the inverted torx bolts in and a 17mm bolt below the starter inline with the PITA oil return elbow to the transmission.
I have half of the shaft still attached to the tranny and the support bar is still in place. If you can please give me a logical approach so I don't kill myself in the process. Thanks.
-
kronus
It sounds like you're trying to remove the auto trans without pulling the engine.. I think? A thing that has helped me in similar situations is unbolting the rear trans mount (with the engine supported with a load bar or something similar) and tilting the back of the engine down to get better access to the bolts.
I got all the bolts out but the torx are still in place (easy access). I was reading about removing the torque converter and it seem a bit confusing. Do I have to unbolt this some how to remove the tranny? I know I have to remove the support bar and the six bolts for the drive shaft and 2 for the support bearing. Is there a particular order to follow to remove the unit safely?kronus wrote:It sounds like you're trying to remove the auto trans without pulling the engine.. I think? A thing that has helped me in similar situations is unbolting the rear trans mount (with the engine supported with a load bar or something similar) and tilting the back of the engine down to get better access to the bolts.
-
kronus
You'll need to remove at least three of the flex disk bolts to separate the driveshaft from the trans, and then the two bolts for the center support bearing to move it out of the way.
I've only removed auto transmissions on e30s, so this may be different, but there should be a triangular plate with three short bolts holding the torque converter to the auto flywheel. You should be able to get at it through the lower part of the trans bellhousing... there may be a cover plate of sorts in the way.
It would help if you snapped a few photos.
-
Ralph in Socal

- Platinum Member

- Posts: 2747
- Joined: Tue Apr 14, 2009 3:32 am
- Location: High Desert of SoCal
Inspection plate, when removed, will allow access to transmission flex plate bolts (3 for early or 4 for later cars). The small inverted torx head bolts are attached to the inspection cover. You can remove the trans without removing the flex plate bolts and the torque converter will stay with the engine. However you have to be really careful to pull the trans straight out (not very easy) or you could damage the input shaft. It makes the trans much lighter as well since the converter is quite heavy.
A transmission adapter for a floor jack is very helpful. Dmitriy has the other stuff well covered.
Ralph
A transmission adapter for a floor jack is very helpful. Dmitriy has the other stuff well covered.
Ralph
There is a very fine line between "Hobby" and Mental Illness.
85 635csi Zinno Auto
84 528i Euro
83 635 Euro Arktik
81 528i Kastanien 5-speed
88 528e Bronzit (Granpa Car)
86 535i Auto (For Sale)
81 633 csi (retired)
85 635csi Zinno Auto
84 528i Euro
83 635 Euro Arktik
81 528i Kastanien 5-speed
88 528e Bronzit (Granpa Car)
86 535i Auto (For Sale)
81 633 csi (retired)
UPDATE: NOV 28th
Had a little set back today, nothing accomplished! I inquired about a transmission adapter for my jack. Turns out my little bullshit jack would have probably got me in the news. I had no idea I would need something a little more robust. I did make a trip to Harbor Freight and they are having a tool liquidation sale going on. I'll pick up a professional jack this weekend and engine stand. If I get some extra hours in, a engine hoist will be in the works or maybe rent one for a couple of hours.
My SS lines were a waste of time and money, tried installing them and only 1/8" of the banjo was threaded in. They are simply too shallow and the oil for the fluid seems a bit tiny compared to OEM. In addition to that they cannot fit into the factory cable management. I priced a set of Meyle for $75 and will go with those instead of the SS lines, just too much hassle
My SS lines were a waste of time and money, tried installing them and only 1/8" of the banjo was threaded in. They are simply too shallow and the oil for the fluid seems a bit tiny compared to OEM. In addition to that they cannot fit into the factory cable management. I priced a set of Meyle for $75 and will go with those instead of the SS lines, just too much hassle

Re: UPDATE: NOV 28th
Which SS lines did you buy?1988shark wrote: My SS lines were a waste of time and money, tried installing them and only 1/8" of the banjo was threaded in. They are simply too shallow and the oil for the fluid seems a bit tiny compared to OEM. In addition to that they cannot fit into the factory cable management. I priced a set of Meyle for $75 and will go with those instead of the SS lines, just too much hassle
Re: UPDATE: NOV 28th
GForce a company in Canada, the build quality is very good but the fit wasn't to my liking. I checked out a set at Turner motorsport ($125) which specializes in BMW, I will probably have better luck there with fitment.billy635 wrote:Which SS lines did you buy?1988shark wrote: My SS lines were a waste of time and money, tried installing them and only 1/8" of the banjo was threaded in. They are simply too shallow and the oil for the fluid seems a bit tiny compared to OEM. In addition to that they cannot fit into the factory cable management. I priced a set of Meyle for $75 and will go with those instead of the SS lines, just too much hassle
UPDATE: NOV 30th
Not much done but did get to install my master cylinder. As usual there is that 1 screw or nut. I had to run to walmart after rounding the nut on one of the supply lines. It got the vise grip and things turned out well.
I finally had the chance to pick up my refurbed wheels and was a little disappointed. The center cap was a different shade gold than the wheels. I brought it to their attention and was surprised after sitting in the shop for a couple of weeks they did not correct this problem. Now the complaining starts about how much time was put into it etc.. I am not interested in the technical aspects of refinishing a wheel or what color the primer is that changed the shade of the color. I paid for a professional job. Long story short they decided it would be easier to do the wheels over than the center caps. Hopefully, I'll pick them up next week. Should have some pics to post at that time.
I finally had the chance to pick up my refurbed wheels and was a little disappointed. The center cap was a different shade gold than the wheels. I brought it to their attention and was surprised after sitting in the shop for a couple of weeks they did not correct this problem. Now the complaining starts about how much time was put into it etc.. I am not interested in the technical aspects of refinishing a wheel or what color the primer is that changed the shade of the color. I paid for a professional job. Long story short they decided it would be easier to do the wheels over than the center caps. Hopefully, I'll pick them up next week. Should have some pics to post at that time.
-
kronus
Re: UPDATE: NOV 30th
I can't imagine how this is possible1988shark wrote: Long story short they decided it would be easier to do the wheels over than the center caps.
Re: UPDATE: NOV 30th
I think the problem started when they decided to do wheels before the center caps and did not have enough paint to finish the job. Two colors that are most difficult to paint are gold and silver. on the center caps he started off with a black primer and according to him the gold turned green, then used a grey primer and it looked "dry" or dull. and settled on a white primer which made the gold really bright. Funny part is that they used the grey primer on the wheels and was not too noticeable because the paint is on the inside of the spokes.kronus wrote:I can't imagine how this is possible1988shark wrote: Long story short they decided it would be easier to do the wheels over than the center caps.
UPDATE: Dec 3, 2012
No work done today but did receive shipment of the leather hides I ordered last week to recover the recaro sport seats and rear headrests. I still think I'll need another cow to get everything done. The back of the seat does not have the plastic cover like the later style recaros. I might just get it done in matching vinyl. I think I'll wait until Jan. to take seats in.
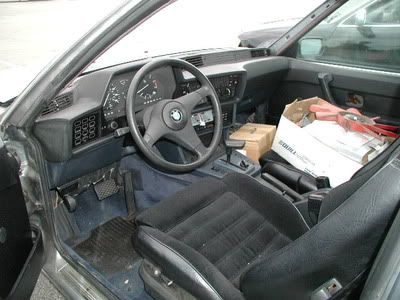
I am considering whether or not to dye the grey leather B pillars I have from the 88 or recover the vinyl set that came with the car. I also want to refinish my steering wheel and built up the diameter a bit.
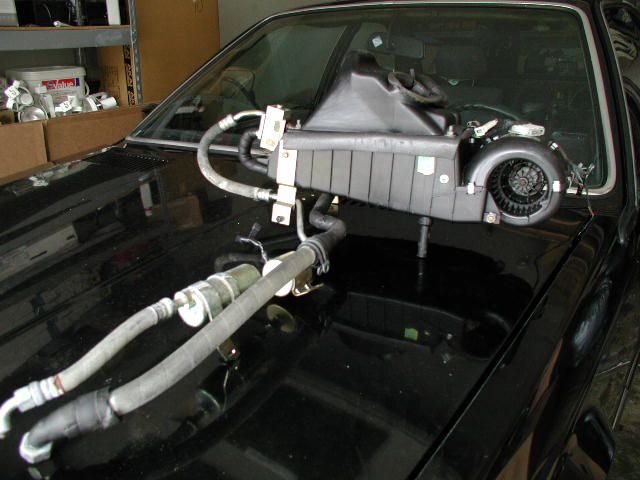
Since I do not have a buyer for the rear AC components I will be converting the 85 and bring it up to date. Its a little bit of work but not too difficult since I don't have to source parts. I think the most difficult part of the job would be to trace the wires for the harness and put them in the 85.
I am considering whether or not to dye the grey leather B pillars I have from the 88 or recover the vinyl set that came with the car. I also want to refinish my steering wheel and built up the diameter a bit.
Since I do not have a buyer for the rear AC components I will be converting the 85 and bring it up to date. Its a little bit of work but not too difficult since I don't have to source parts. I think the most difficult part of the job would be to trace the wires for the harness and put them in the 85.
UPDATE: Dec 7, 2012
Not getting much done lately, Ive been sleep deprived and need motivation. Still have to trace out my harness for the rear AC and collision light. I have been fortunate to have the garage next to the 85 Euro become available so probably next week sometime I will move the 88 into that spot. Makes it much easier to swap parts a few feet rather than 10 miles apart.
On a brighter note my 2.93 LSD came in today. I have to pick up some oil for refill since it was drained for shipment and some paint to make it look presentable. (Will post pics when its all unpacked)
I dropped by to pick up the wheels from Wheel Medic this afternoon and they changed their minds once more. The wheels were not ready! They decided to refinish and color match the center caps instead. The color is not a perfect match but probably as close as they are going to get. Gold and silver is a PITA. I approved and gave the go ahead to clear coat. Its been awhile and I just want to get past this stage of the process. Next I am going to take in all the bits and pieces from the engine bay for blasting and powdercoat. I also need to have a talk with the upholsterer about pricing to restore the Recaro seats and rear headrests.
UPDATE: Dec 13, 2012
Finally! I have my wheels. Pick them up yesterday....they are not perfect. Overall, it is a decent job my only complaint is the slightly darker shade of gold on the center caps. I'm just too picky at times when it comes to spending my money. I guess they would have been perfect if they had been done in the same batch of paint.
I gotta borrow the Missus' camera to take pics. Ever since I upgraded to Mountain Lion my camera is not communication with my Mac. It has a little age on it anyway (about 10 yrs) they don't even make the USB cables for it anymore. Time to upgrade. Hello, Mr. Claus, hint..hint.
Don't think I will be buying tires anytime soon since it will be awhile before the car his the road. I did price some Michellin Pilots $$$$ ouch!
Right now, I think I will concentrate on what needs to be done without costing me any money. I still have some electrical issues to sort out, re-code the door locks and the wiring harness for the 1.3 upgrade. It would be nice if I can find the parts, source the connectors or at least the tool to pull the wires out of the harness terminal. I hate to see a bunch of spliced wires under the hood. I would like it to look as if nothing has been modified. Radio Shack sure isn't the place to find what I need. Anyone has some suggestions?