Page 1 of 3
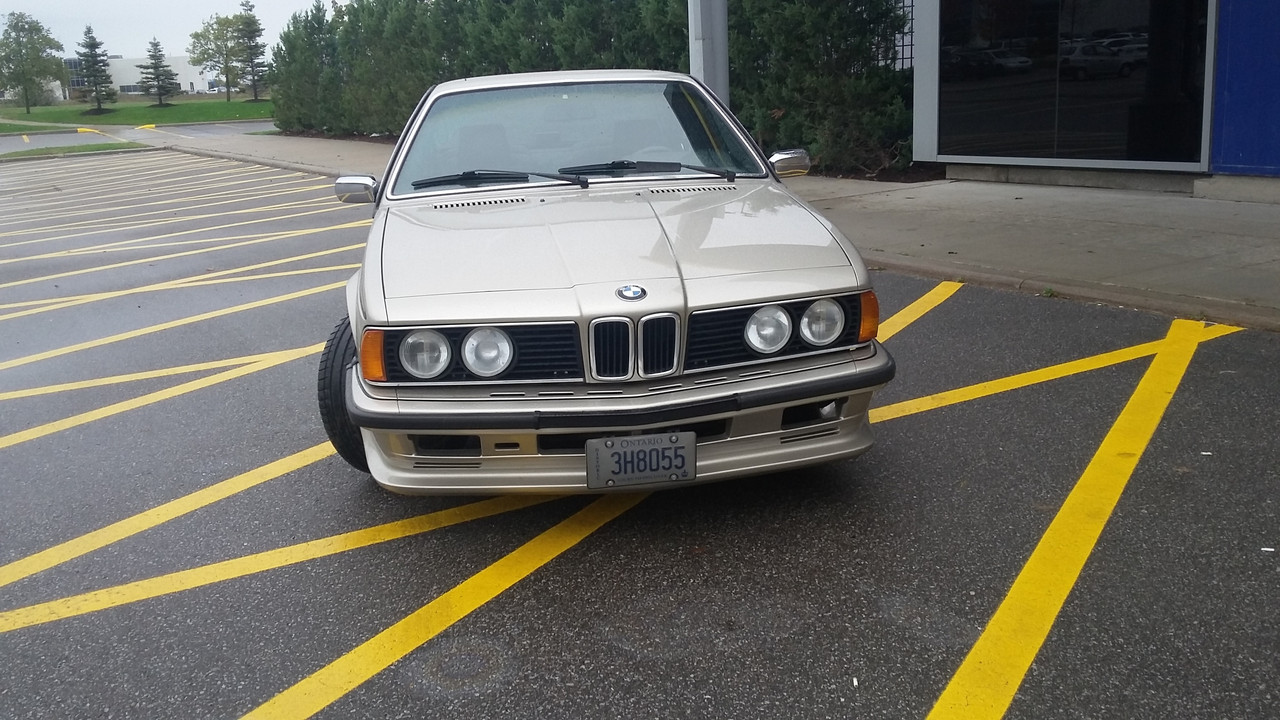
'86 Canadian Bronzit-Beige Moneysucker
Posted: Fri Jun 02, 2017 8:05 pm
by val_c
After so many years on the BC it's time to start documenting ongoing work in one thread.
Some of the previous projects can be found below:
US to Euro bumpers swap
US sealed beams headlights to CIBIE CSRs
The recent one is the elimination of my analog auxiliary gauges for oil temperature, pressure, and voltmeter (btw
gauges are for sale if anyone interested) and return to original central console with the ashtray.
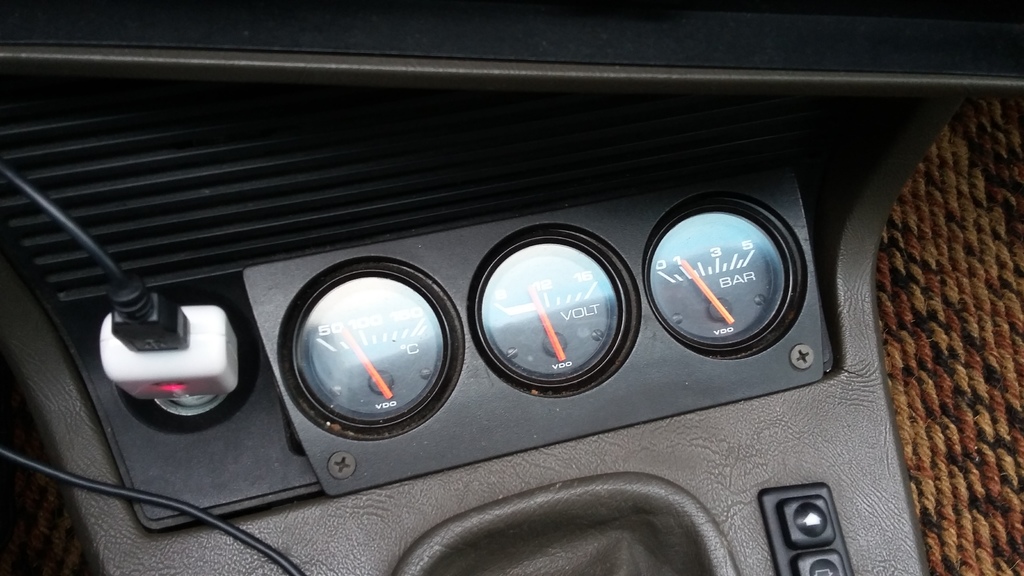
Instead of oil temperature and pressure analog gauges, a digital kit from
Roland will be installed into the instrument cluster.
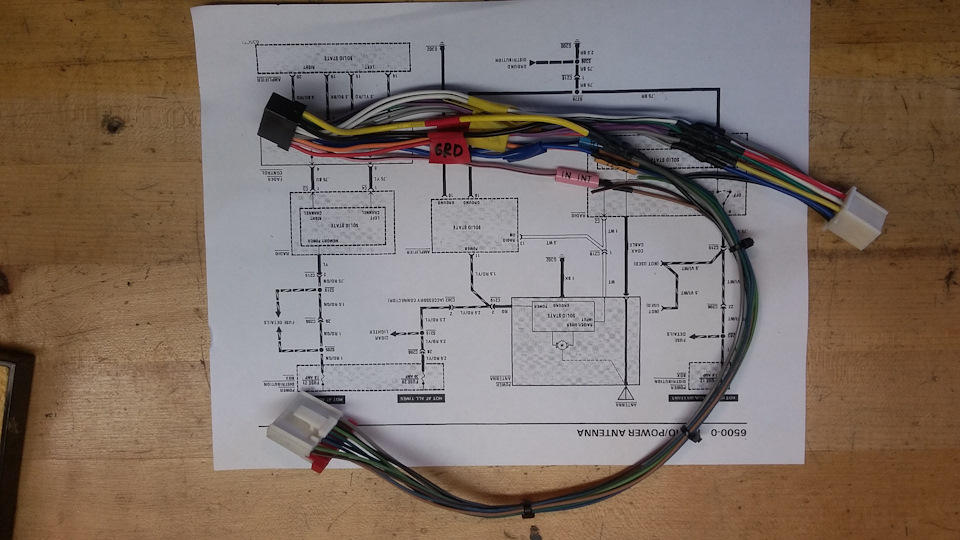
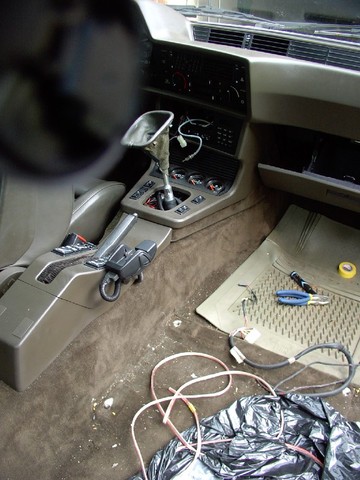
But first I've had to eliminate all spaghetti I'd created behind the central console when I installed the aftermarket head unit and speakers.
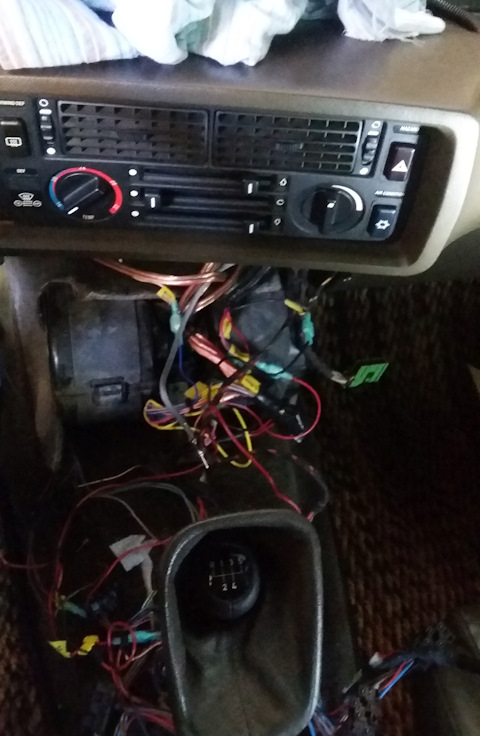
If anyone needs to know the wire color coding is:
White — power antennae.
Brown — ground. Check with the tester, apparently not all brown wires are grounded. I had to choose one which is and insulate the rest.
Violet-White — +12V ACC;
Red-Green — +12V always hot;
Red-White — illumination.
Yellow, Blue - fader — do not use.
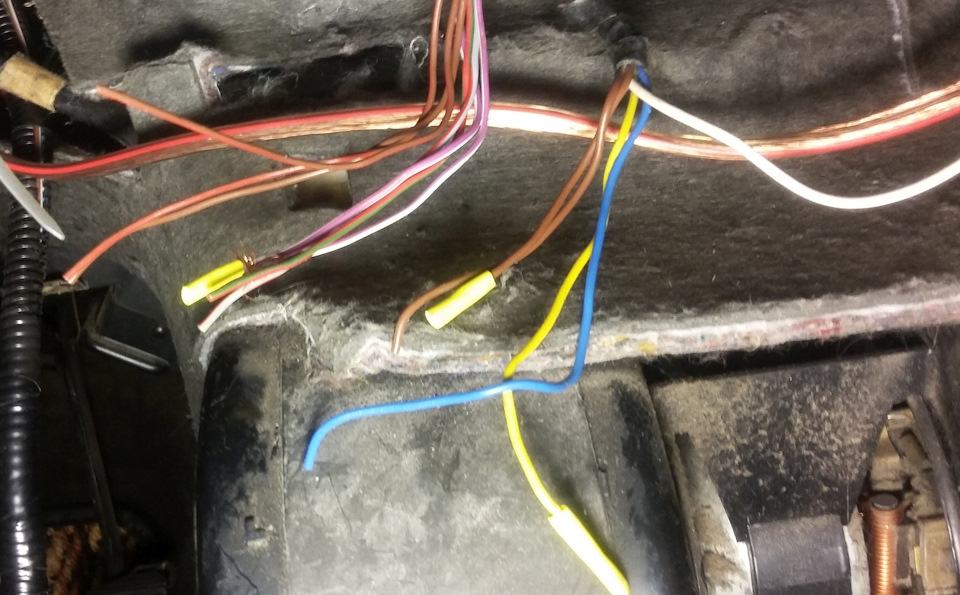
Then I've soldered connectors for the aftermarket head unit and speakers:
Soldered plugs in the car:
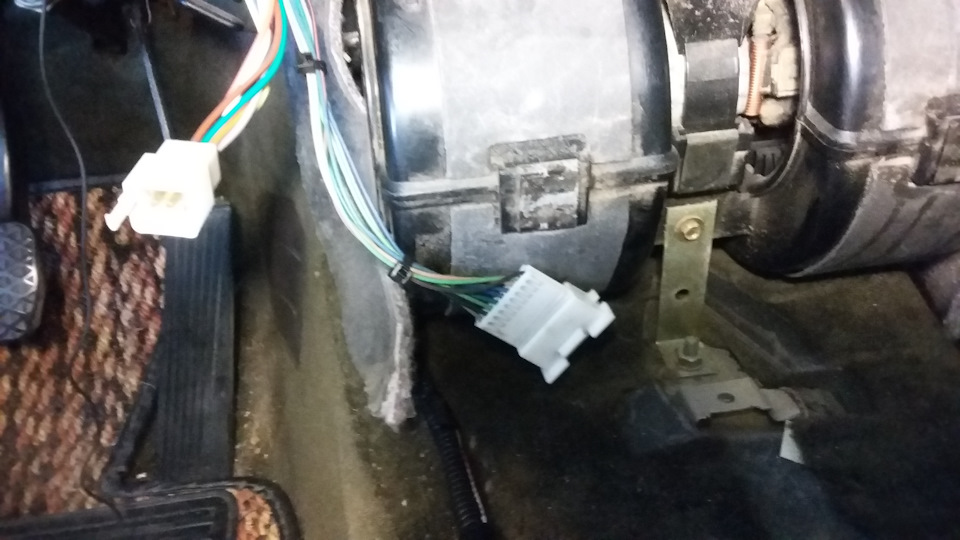
So now the head unit is good to go back and can be connected as it should.
Central console re-gluing.
Posted: Fri Jun 02, 2017 8:15 pm
by val_c
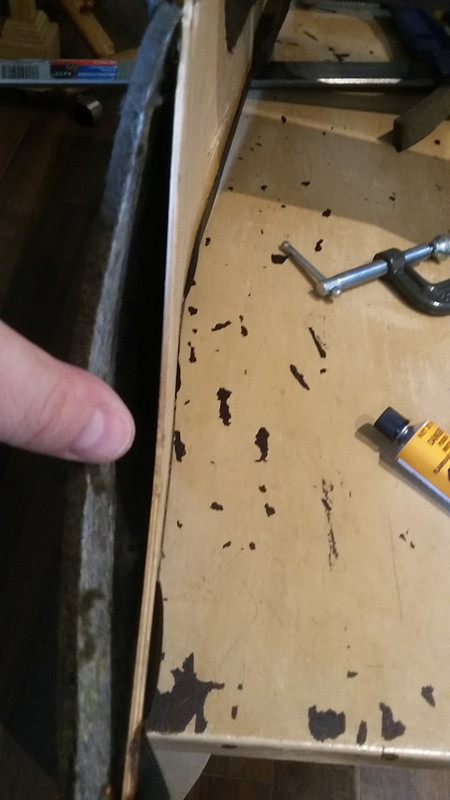
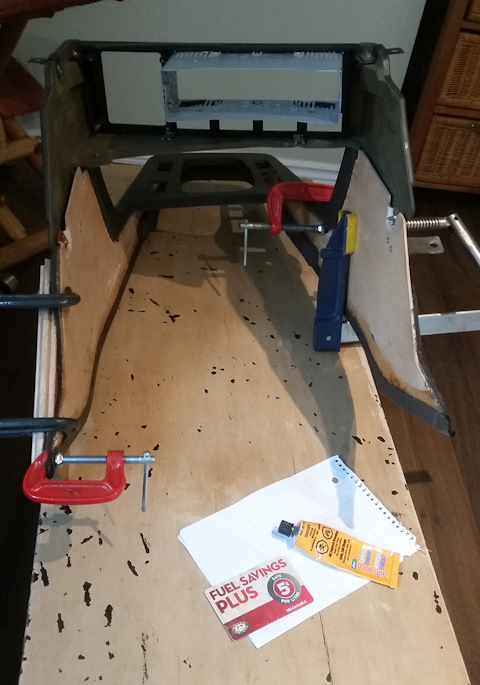
The next necessary step was the restoration of the central console. During the years, plywood got cracked and got separate from plastic, where glue seems to dry out.
This glue from dollar store seems to be working pretty well. I've also used it to glue back plastic details on the inner sides of door cards in BMW e36 and it holds perfect when cured.
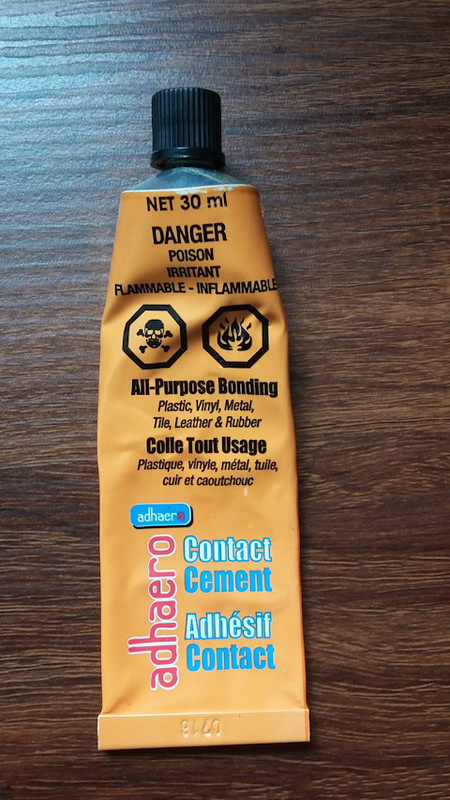
Curing:
Re: '86 Canadian Bronzit-Beige
Posted: Fri Jun 02, 2017 8:27 pm
by dwcains
Hi Val:
Nice work, and I discovered I can get much more air flow through the A/C fans by trimming back the plywood on either side of the center console:
BEFORE:

AFTER:

I've seen grilles installed in the carpet, too, but haven't done that with mine.
Re: '86 Canadian Bronzit-Beige
Posted: Fri Jun 02, 2017 8:29 pm
by val_c
Dean:
Good idea, I'll look into that.
I don't see any wool insulation on your photos and there is some on mine. Have you removed it as well? The fan looks brand new too. I have a motor coming in but not sure if I have to change it, as original one seems to be still OK.
Digital gauges installation.
Posted: Fri Jun 02, 2017 11:00 pm
by val_c
There is a kit received:
Below are the photos with mods had to be done to the cluster to install provided digital gauge(s). This will work for manual cars, automatic one will obviously loose gears indicator lights.
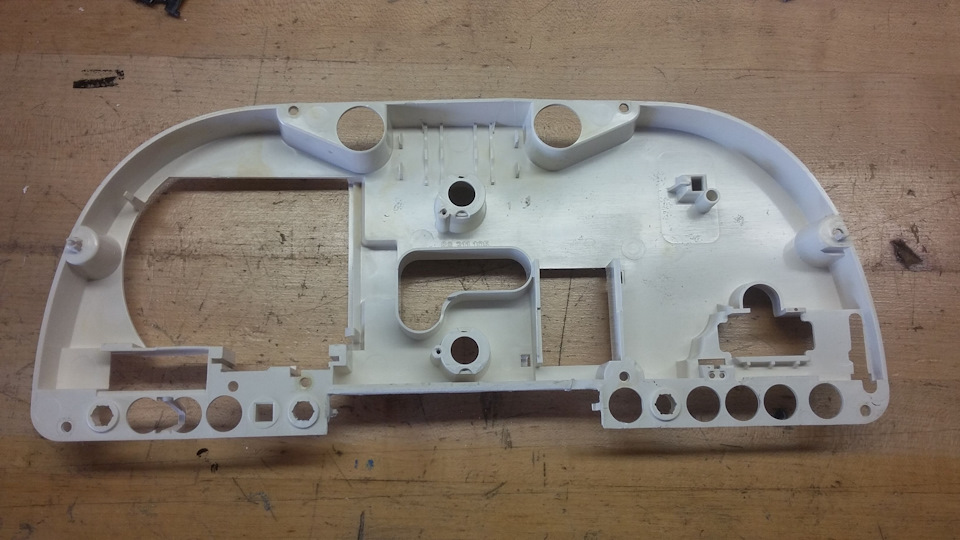
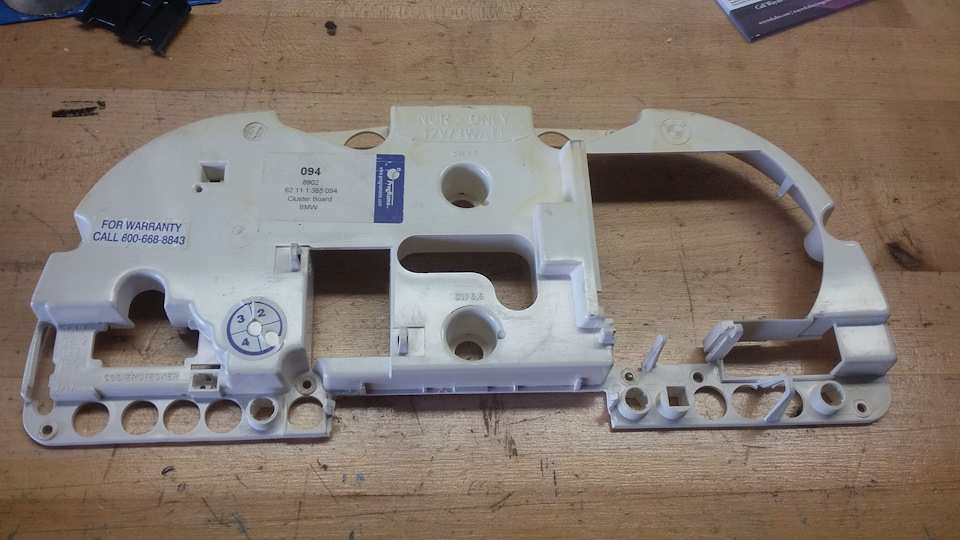
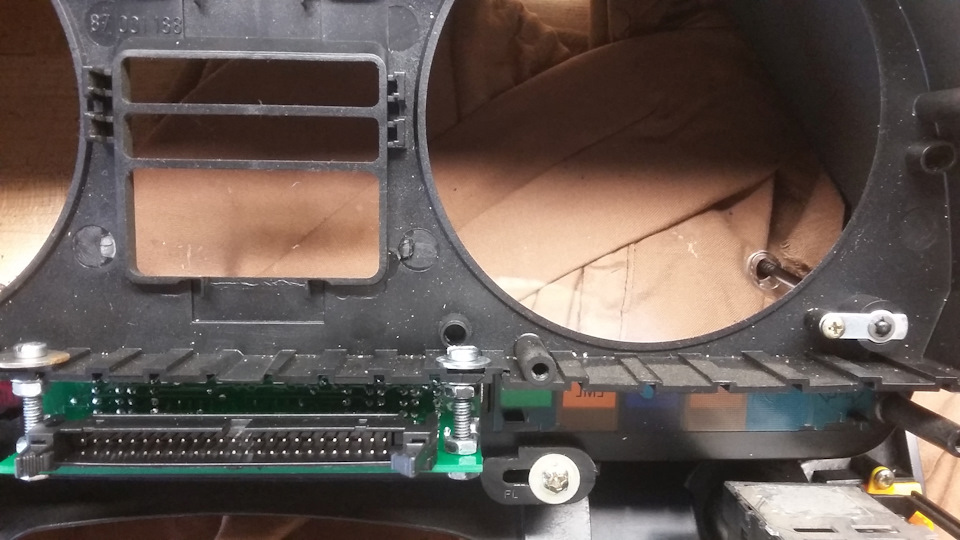
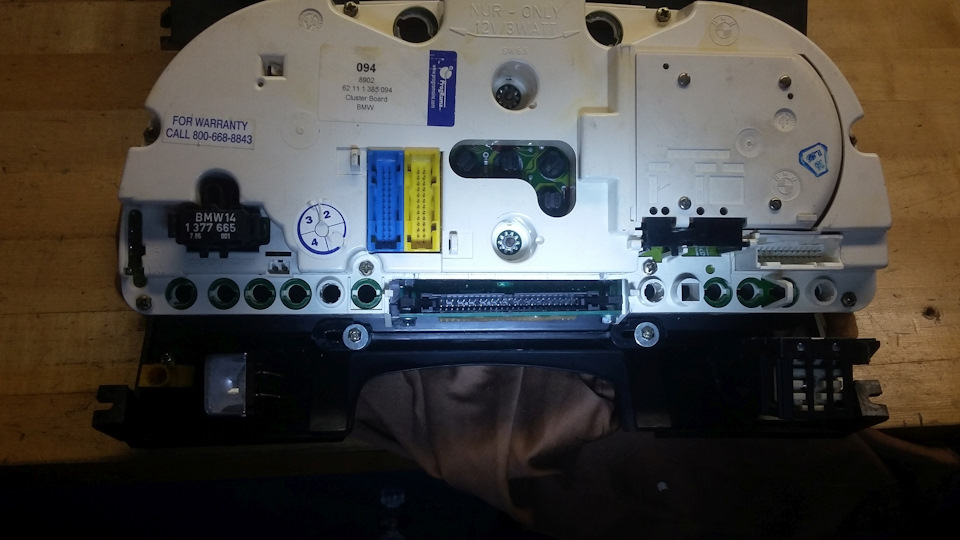
Part of the white back panel has to be cut off. I used Dremel and file:
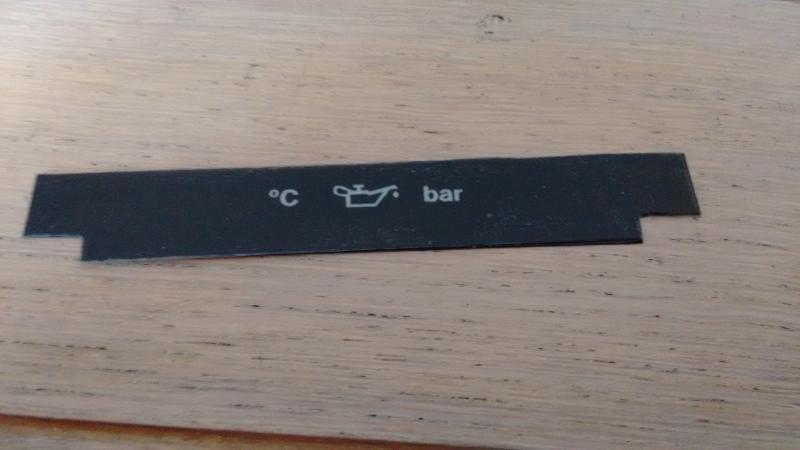
The gear indicator insert was replaced with the one provided with the kit. Yes, it's my fingerprint inside the cluster.
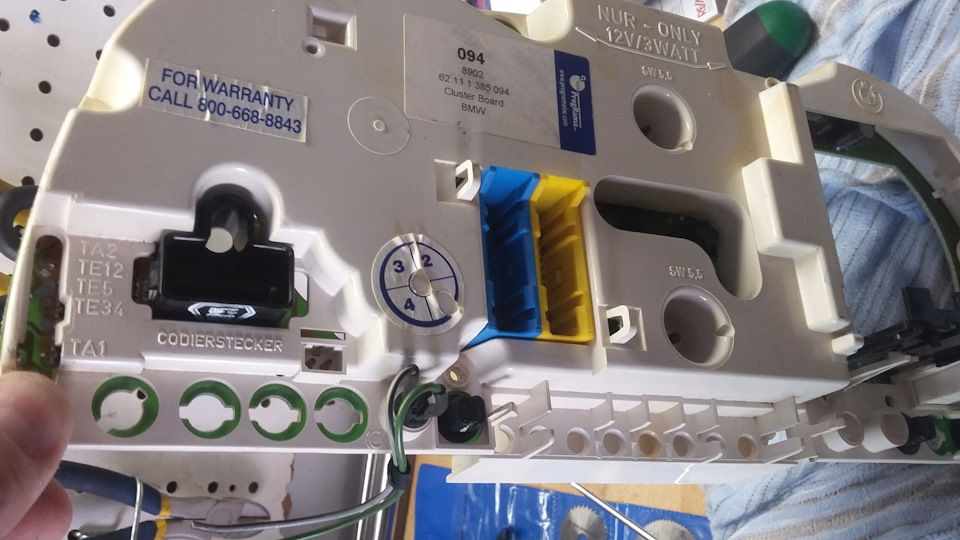
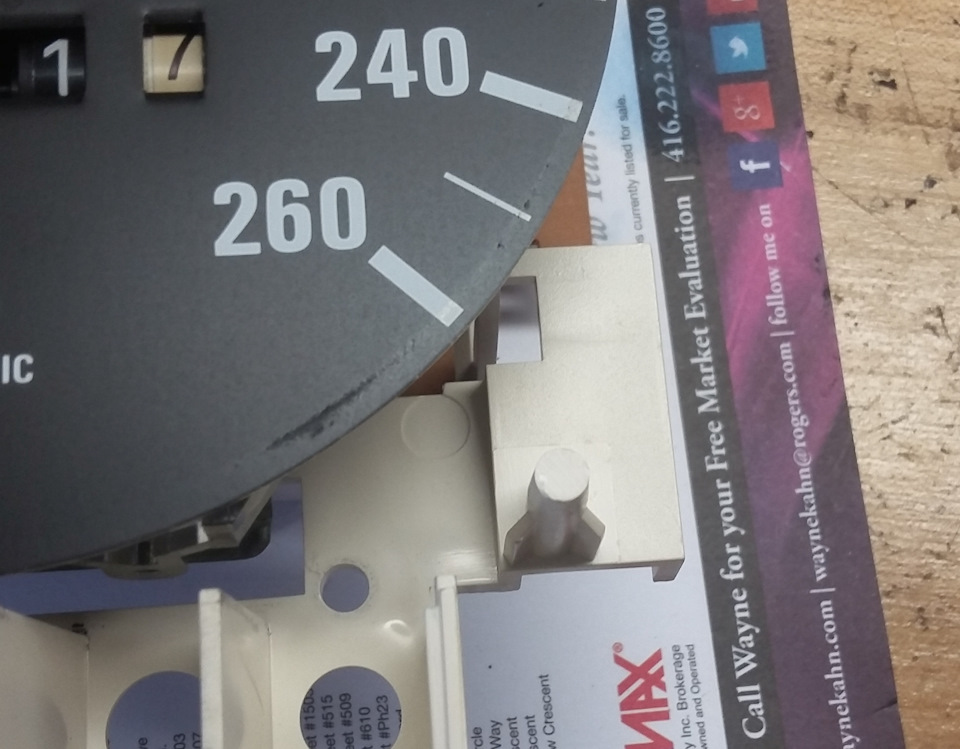
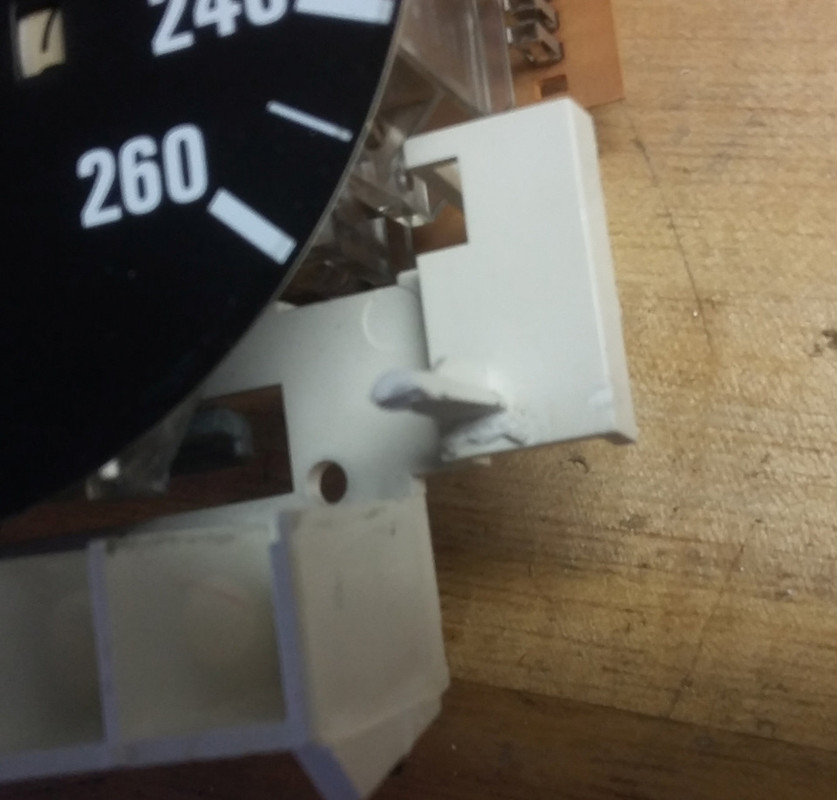
Then printed board with digital indicators should be mounted. I drilled necessarily holes and used Loctite to secure nuts:
Then I tried to assemble the cluster back just to find out that I cannot close it completely. The reason for it was speedometer pin which hit one of the washers I had to use for printed board mounting. I ended up to cut half of the pin.
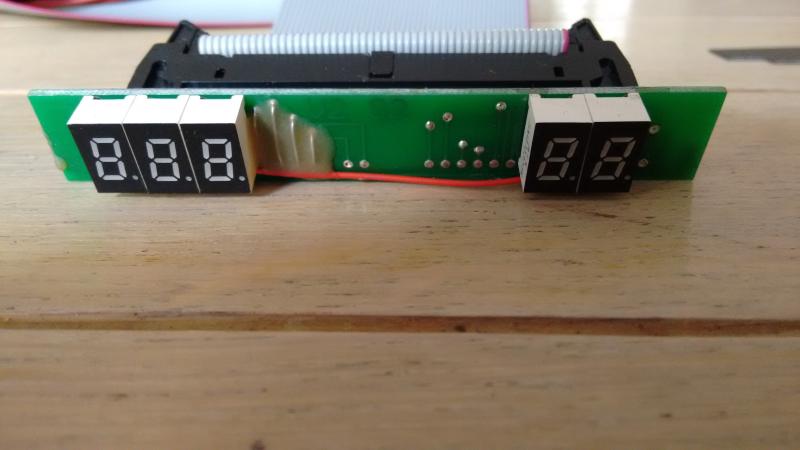
That's how assembled cluster looking from the back now:
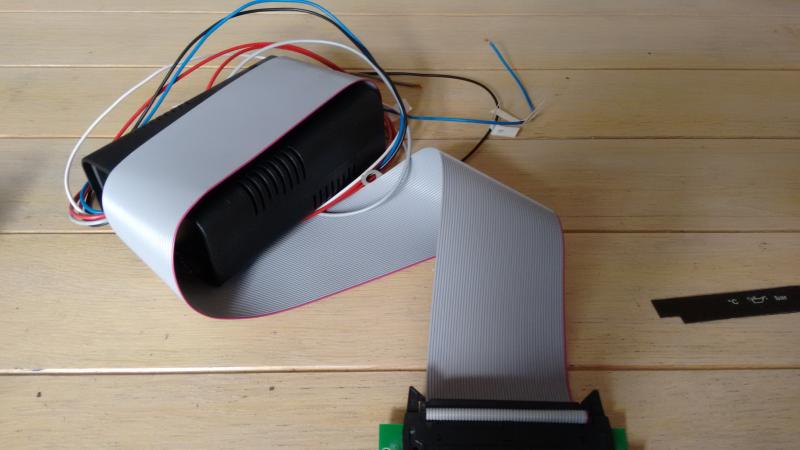
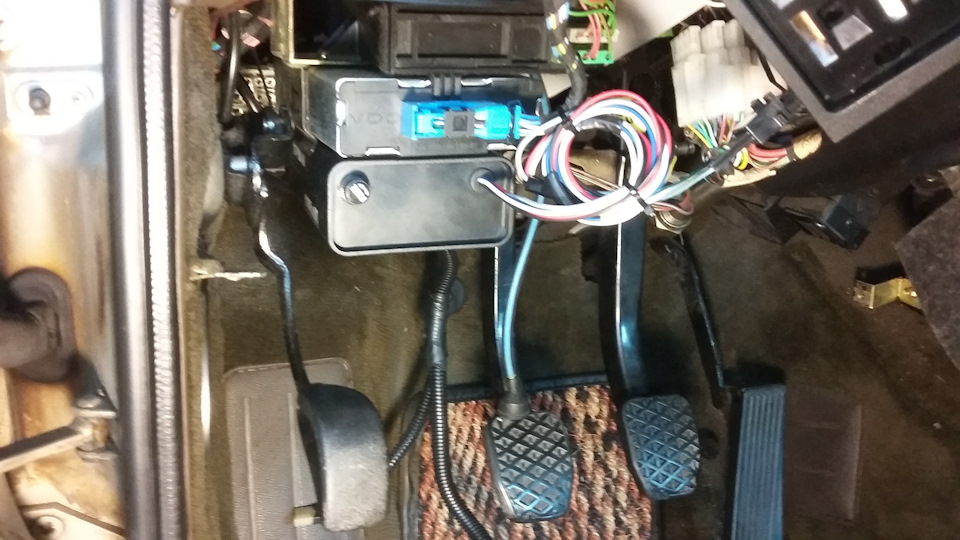
I used Velcro to hang processing unit and re-routed wires from oil temperature and pressure senders and connected switchable power, ground and illumination wires, using some plugs I had lying around. I haven't tried to put the lower panel in place yet, hope that it will clear the processing unit, otherwise, it will be difficult to find where to mount it.
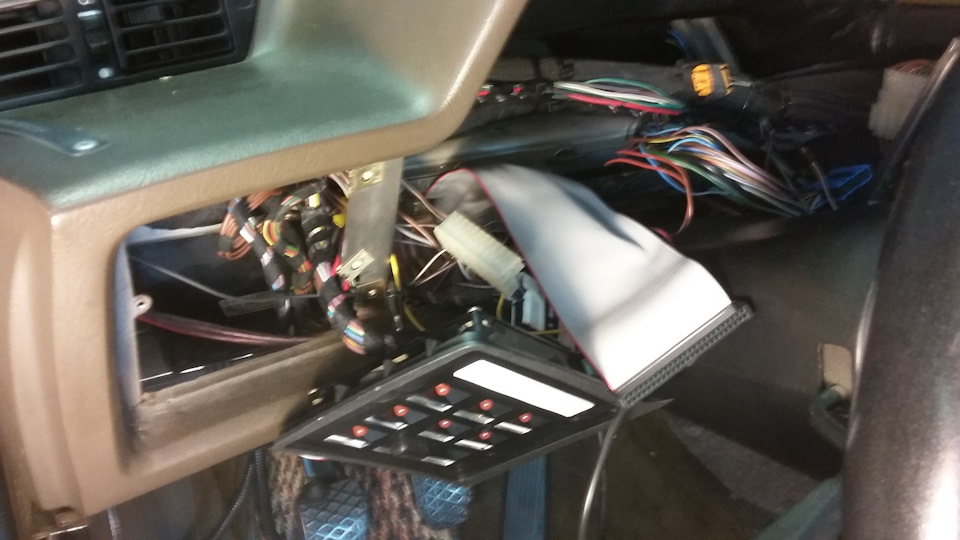
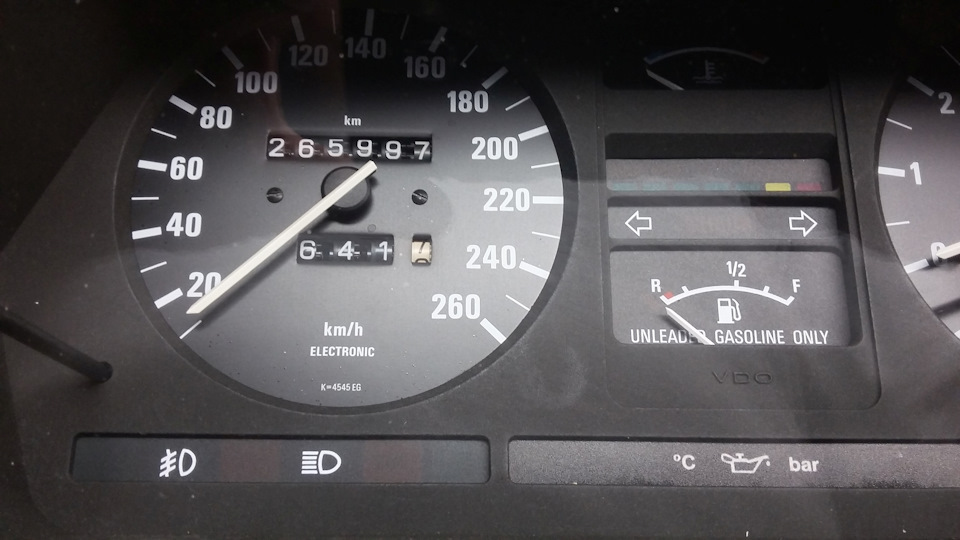
Temporary hooked up instrument cluster to see what it's all about:
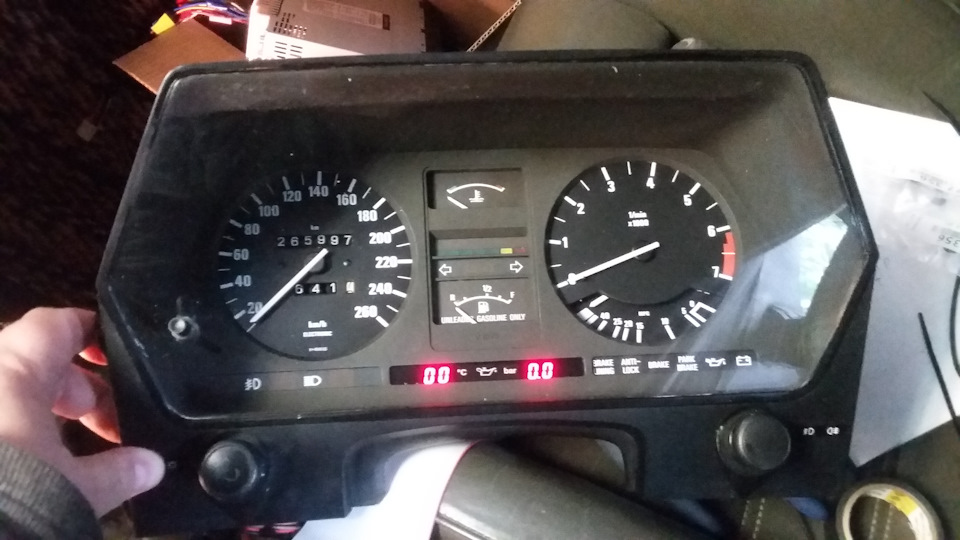
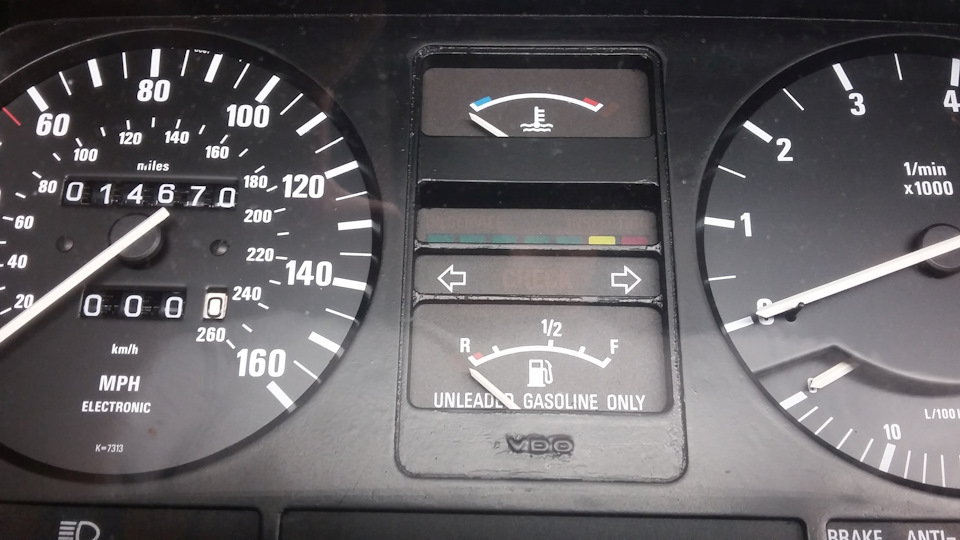
Instrument cluster installed and test drive done. It's alive!
Just started, engine is cold:
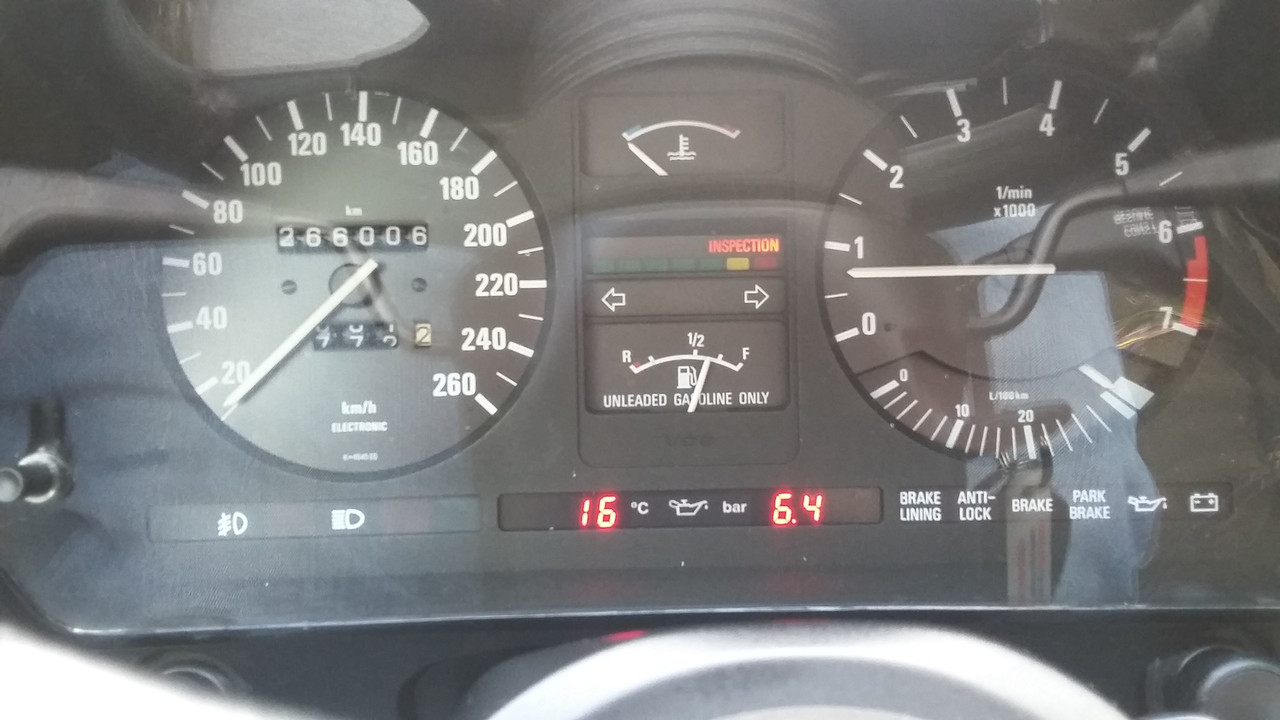
After a few minutes of driving:
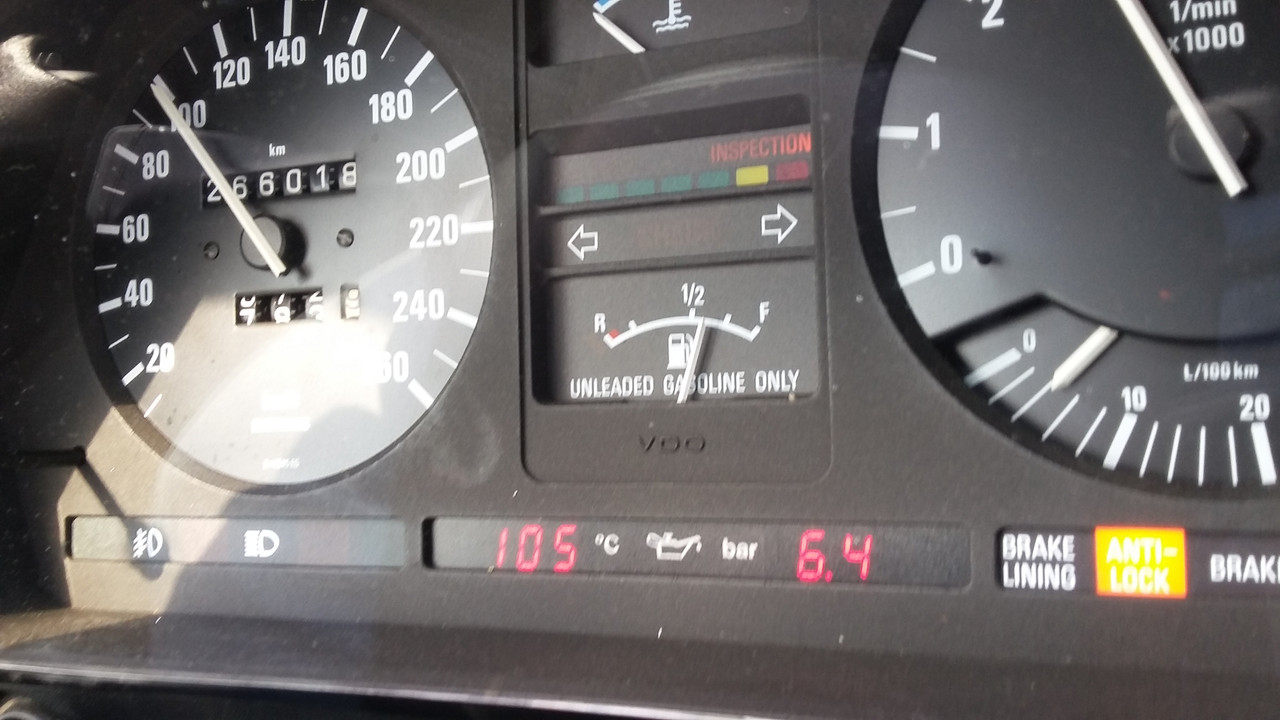
Looks nice!
Re: '86 Canadian Bronzit-Beige
Posted: Fri Jun 02, 2017 11:34 pm
by MrE
That's marvellous Val, really interesting to see the work and detail. Thanks for the pictures and write-up, its great to see it documented like this.

It can be a bugger working on that fiddly and delicate instrument cluster, but it'll be well worth it - those digital gauges look really good.
-Ellis
Re: '86 Canadian Bronzit-Beige
Posted: Fri Jun 02, 2017 11:53 pm
by val_c
Thanks, Ellis!
I have to add that I always admire photos you guys post from Australia from your get togethers.
Re: '86 Canadian Bronzit-Beige
Posted: Fri Jun 02, 2017 11:59 pm
by dwcains
Val_C wrote:Dean:
Good idea, I'll look into that.
I don't see any wool insulation on your photos and there is some on mine. Have you removed it as well? The fan looks brand new too. I have a motor coming in but not sure if I have to change it, as original one seems to be still OK.
There wasn't any insulation in my car's console, and new carpet was installed by the previous owner before I bought the car. I had the motor and fan assembly out last year, and refurbished it, but it was in good condition already. I'm guessing it also wasn't the original part. You're doing great work on yours, and it's motivation to get mine finished. Not easy to do, now that the hell of summer is here in S. Florida.
I've got two clusters, also. One is from a Euro 5-series and the other is the US 6-series luster installed in my car during Federalization. Hopefully, I can make one good 6-series Euro cluster using the 5-series gauges, and I'll have the useless 5-series cluster to experiment with before repainting the 6-series cluster.
Instrument cluster repaint went wrong.
Posted: Sat Jun 03, 2017 1:28 am
by val_c
Initially, I wanted to use junkyard cluster with its housing for digital gauges installation. But coating inside of the cluster looked faded to me and since the clear cover was already detached I decided to refresh insides with matte paint.
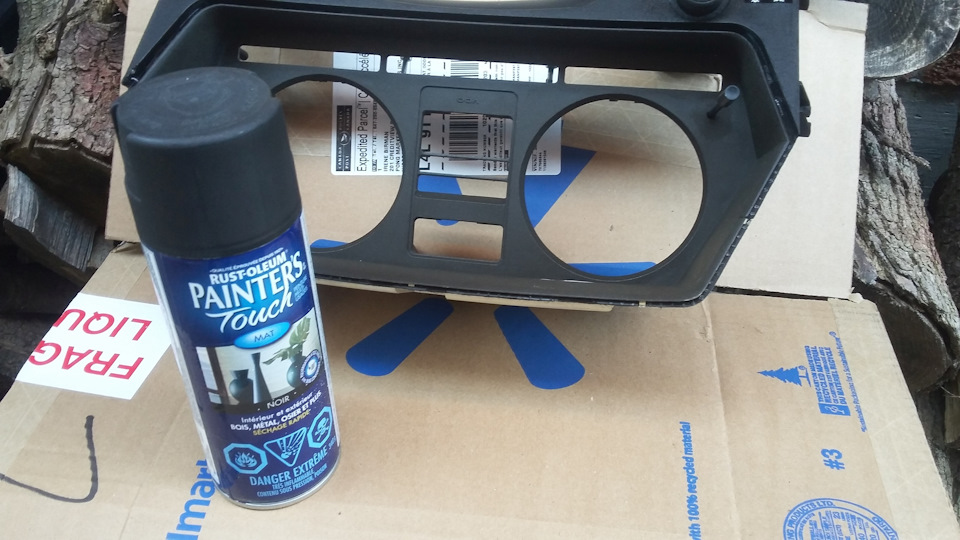
It didn't go too well. Paint in some places started to bubble and after 30-40 min wasn't anywhere close to dry. The whole surface remained sticky. I was surprised to find that inside coating of the cluster felt sticky but I thought that maybe plastic started to disintegrate from the age.
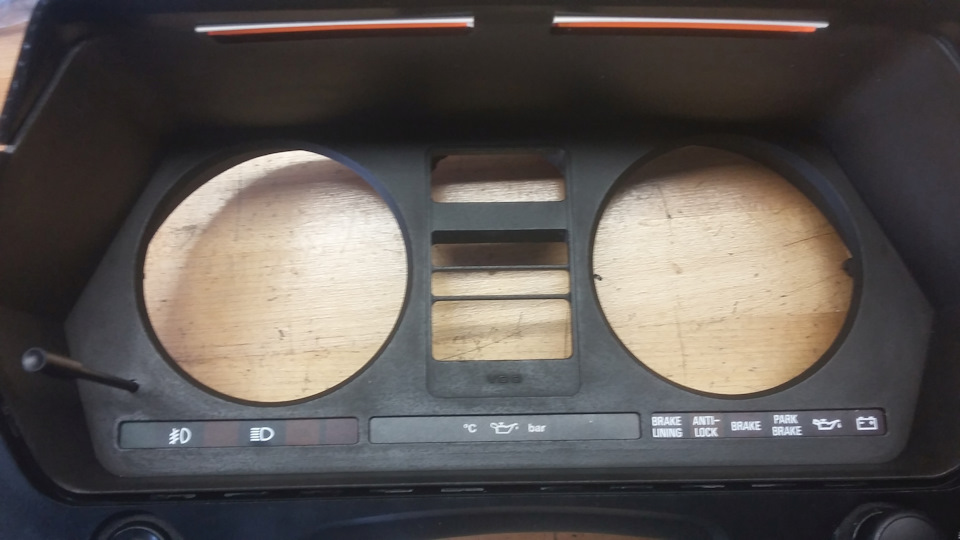
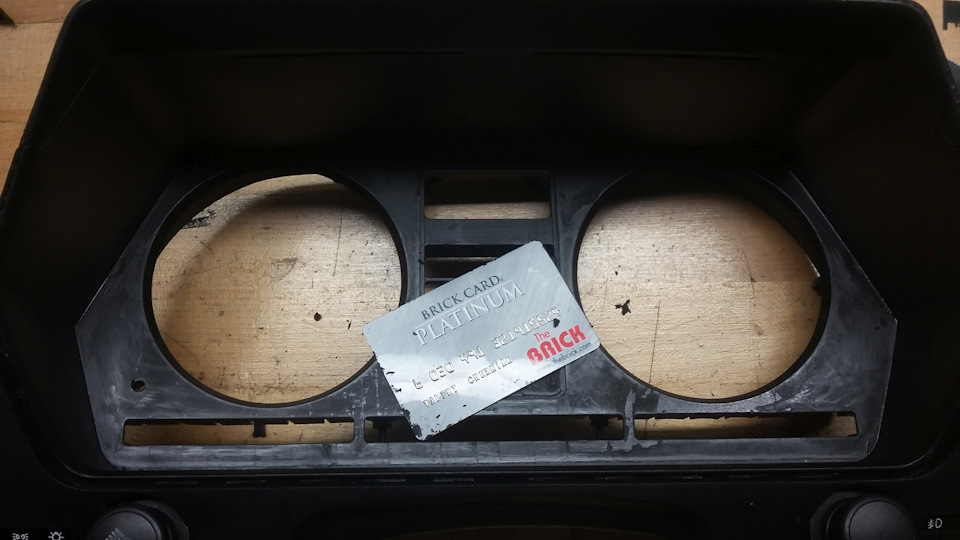
When I tried to remove the fresh paint and original coating with sandpaper it didn't work. The coating was rubber-like and just glued to sandpaper. In the end old plastic card followed by sandpaper somewhat worked.
After cleaning the surface with acetone I hit it again with the paint it turned out just OK but not perfect, for example, it's very visible on VDO letters that work is sub-par and I've messed up:
Disappointed with results, I've decided to use cluster housing from the car. When I accidentally touched inside with the finger, I felt the sticky surface again so now I am thinking that this sticky surface is original by BMW or both clusters started disintegrate from the time?
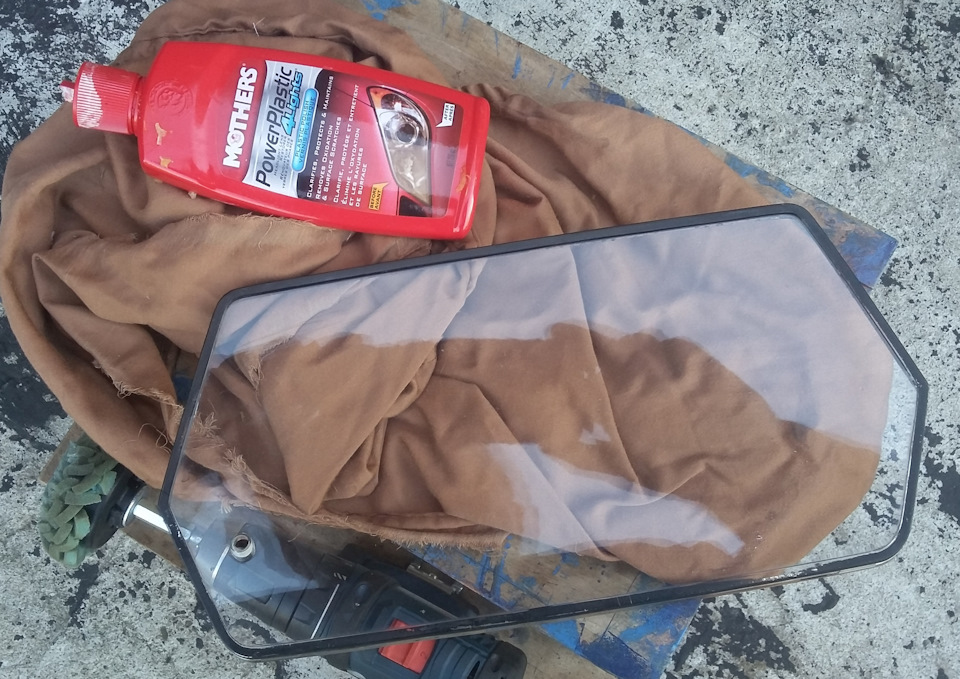
I used Mothers headlights restoration kit on instrument cluster clear cover to remove small scratches and dullness.
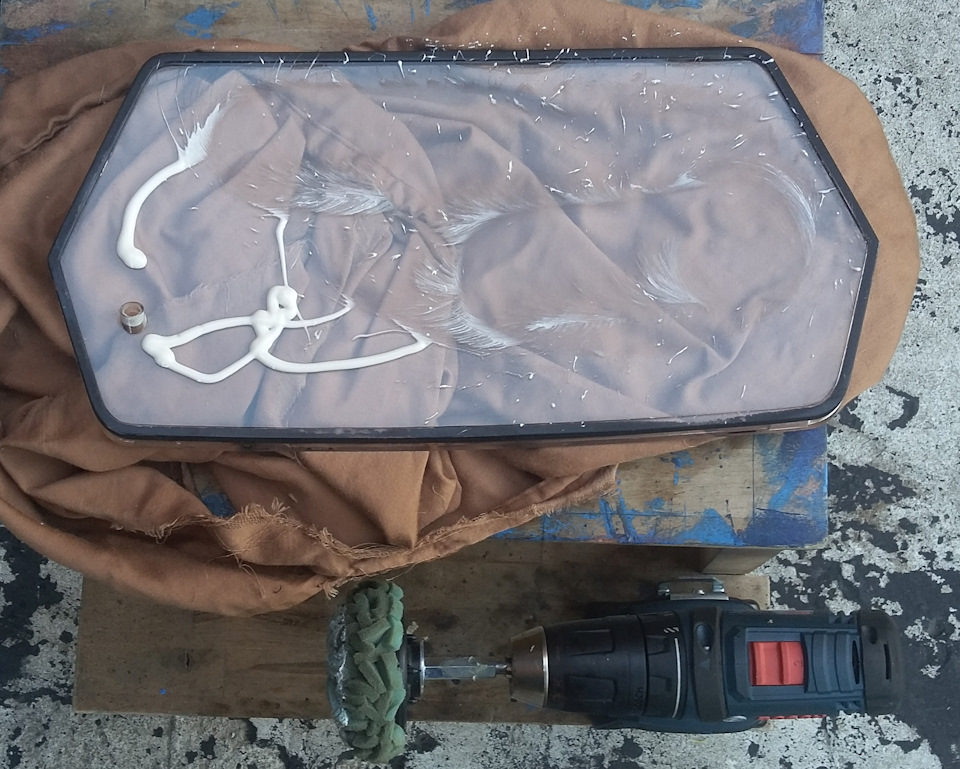
This turned out pretty well and I did the same with the second cluster. One notice though, one has to be quite careful with polishing wheel since edge black paint is easily removed.
Windshield washer system overhaul.
Posted: Sat Jun 03, 2017 2:05 am
by val_c
Some time ago I also overhauled windshield washer system. I never liked original over-complicated system with two valves #61661380464 abnormal amount of hidden connectors, Ts etc.
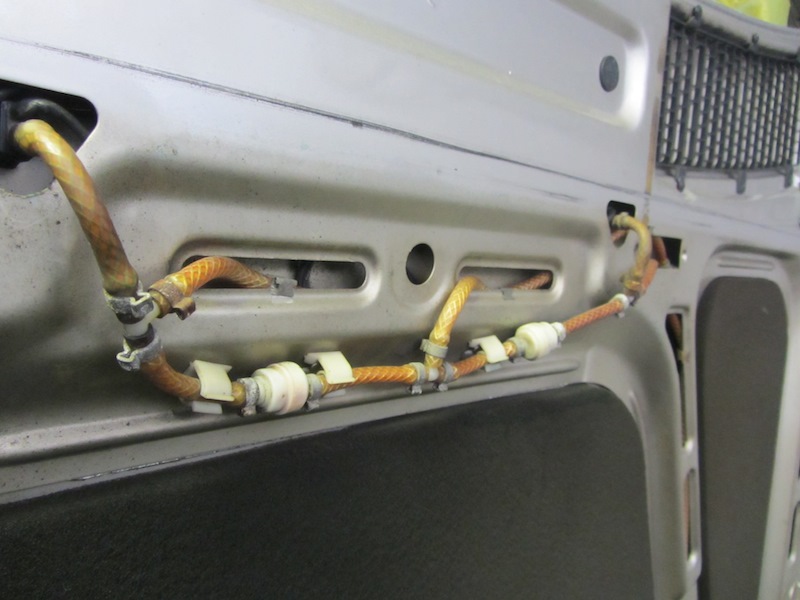
So when one of the valves started to leak? I purchased new T-valve #61661374978 and wanted to cheat a little, using non-original tubing and regular ford screw-clamps. After assembly I found that all system leaked badly in the connection points.
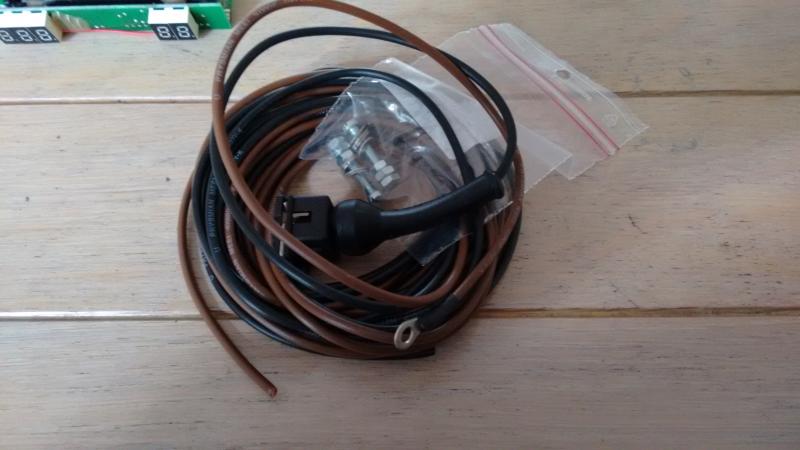
Then I've got original BMW tubing and 8.5-9 mm Oetiker clamps. For them I've had to purchase special tool as well, luckily they are available on eBay for fraction of new tool cost. In the end system looks like this:
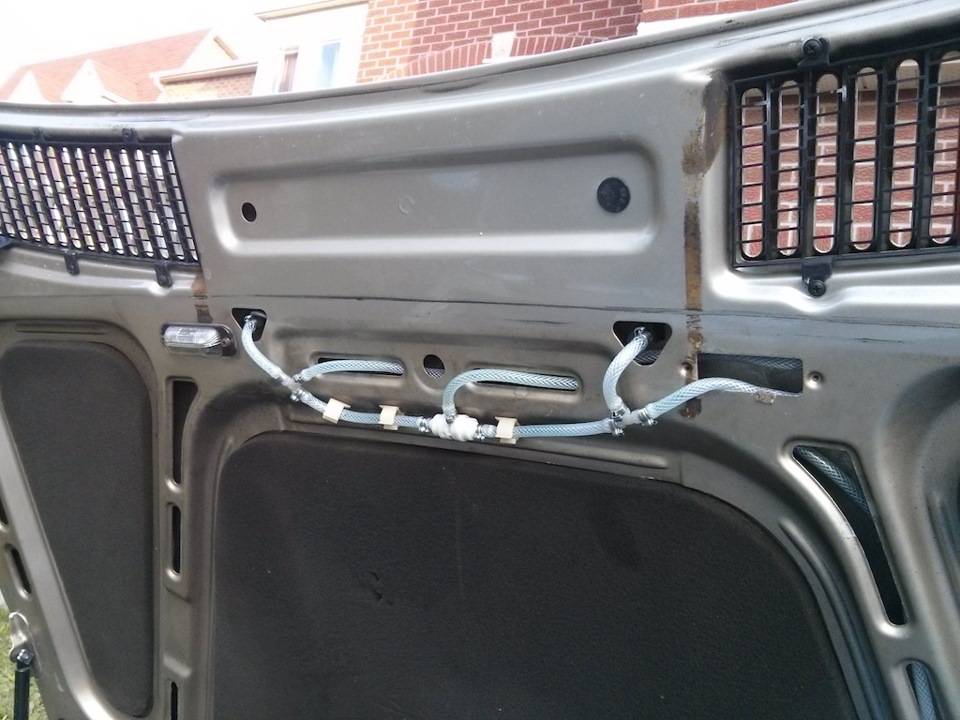
When work was completed, I realized, that even better approach would be to use spray nozzles from later BMW models #61311366861 and generic inline valves instead of original BMWs. They probably would work better and would be hidden from the view.
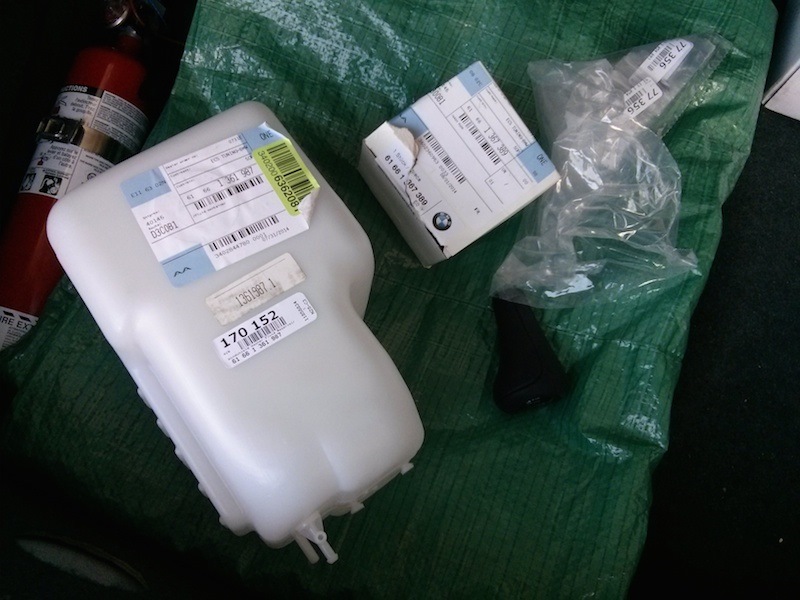
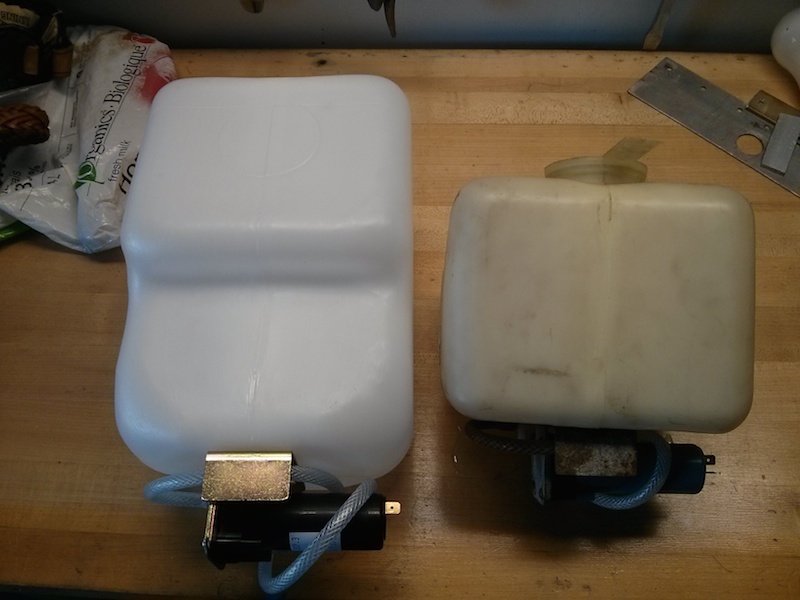
The second part of system overhaul was to change North America version of the windshield washer fluid main reservoir to the European one. I never understood what was the reason for installing such a small tank in US/Canadian cars, definitely, space wasn't a limitation.
I got sick and tired of running out of the washer fluid all the time at the most inappropriate moment. So I purchased European tank #61661361987, and new pump.
This is a difference between US and European tanks:
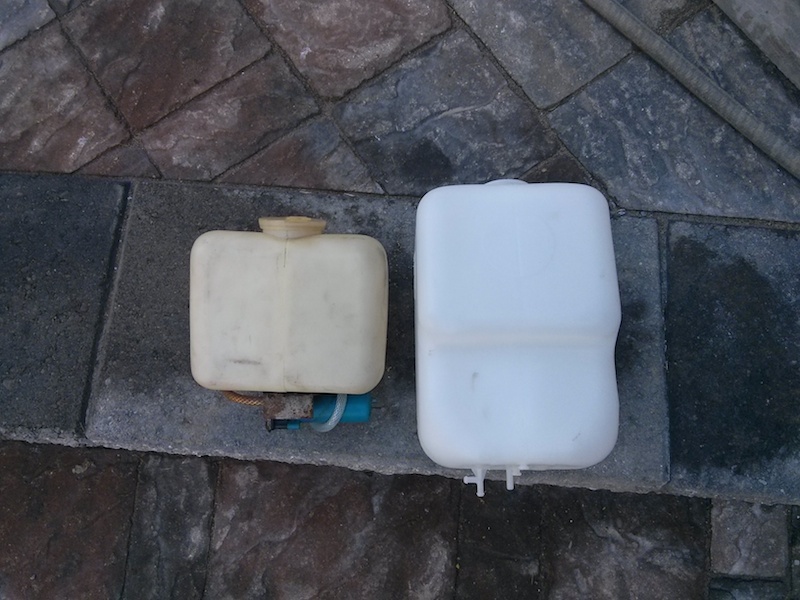
The pump installation doesn't require any tools but a small hammer:
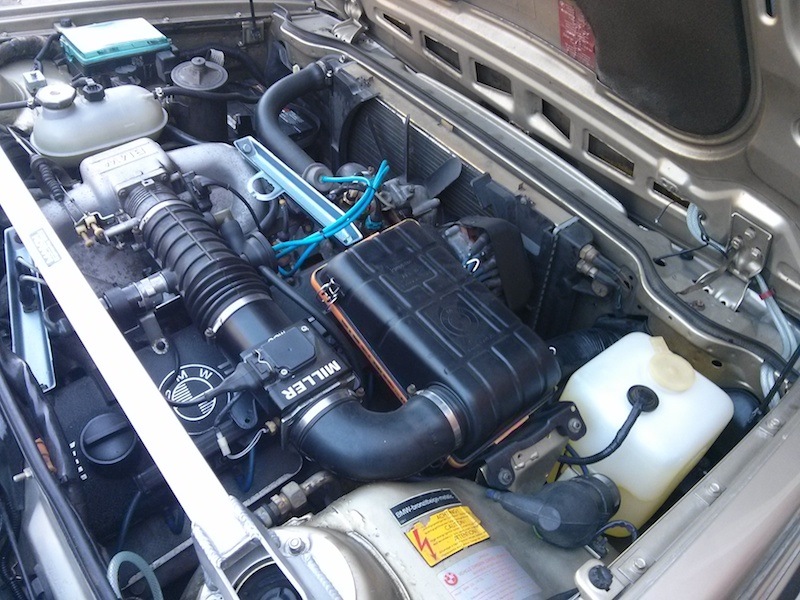
New tubing hooked up:
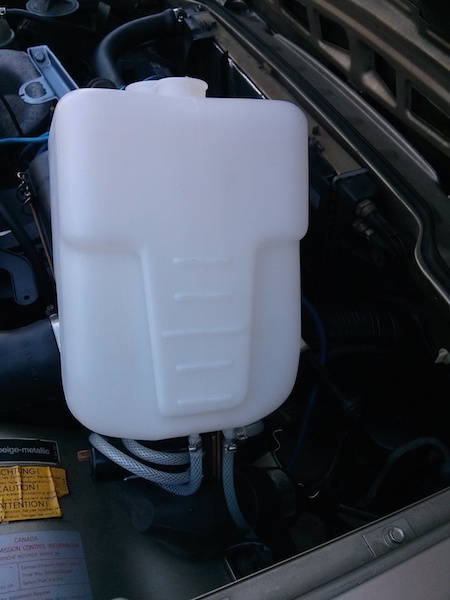
European tank in place. It fits in the original bracket and doesn't require any additional support.
I believe it's about 5 L. Pretty standard and very convenient.
New speakers wiring and modified speaker pods.
Posted: Sun Jun 04, 2017 10:30 pm
by val_c
Another old and small project: installing the new head unit, running speaker wires and modifying rear speaker pods to accommodate 6x9 speakers.
Set up used: Alpine CDE-133BT head unit with 4x6” Pioneer TS-A4670R speakers for the front and 6x9” Pioneer TS-G950M speakers at the rear.
At some point, I've decided to eliminate OEM head unit with amplifier and install new speakers. For the speakers, I also wanted to run new wires and not to use car body as negative wire how it was done from the factory.
New wires run:
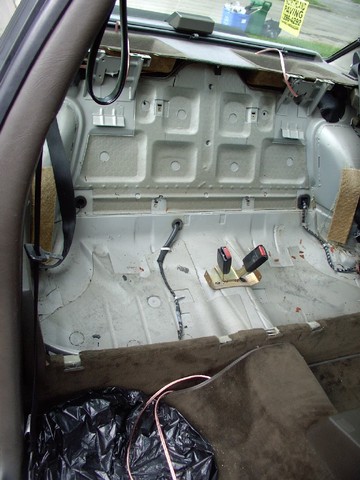
Pathetic original speakers:
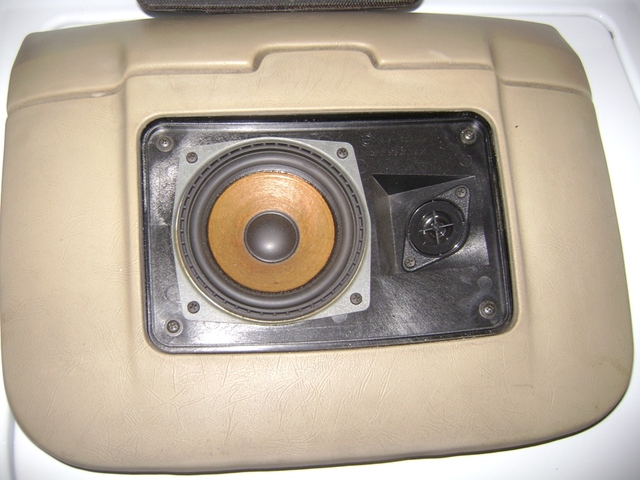
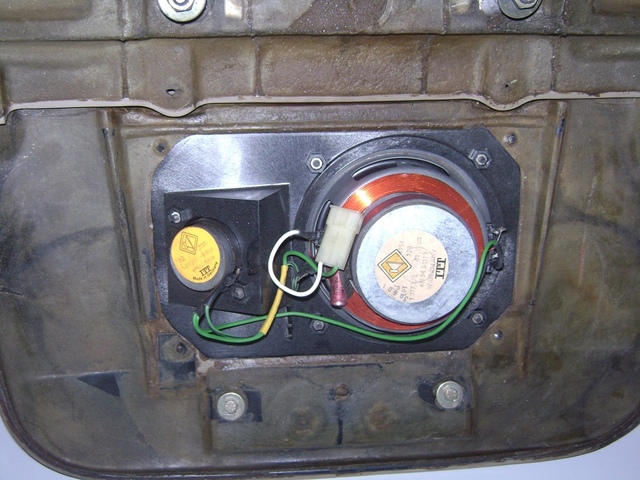
Plastic mounting pods with removed original speakers. The plastic should be cut to clear the new speakers. The plastic pods will not support new speakers but needed to clip on them original grills:

MDF plate cut and bolted:
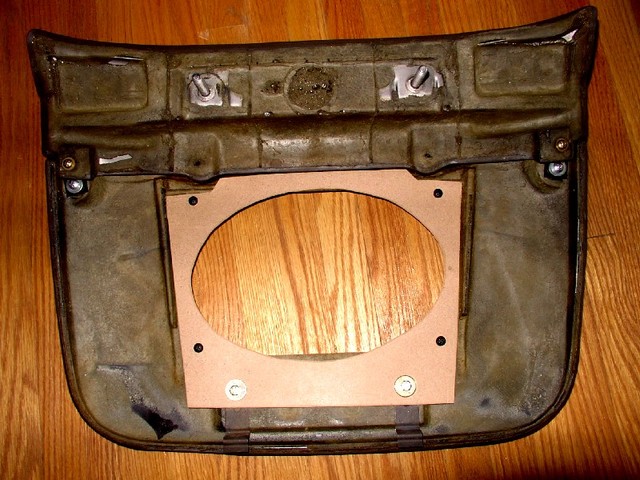
Speaker bolted to MDF plate:
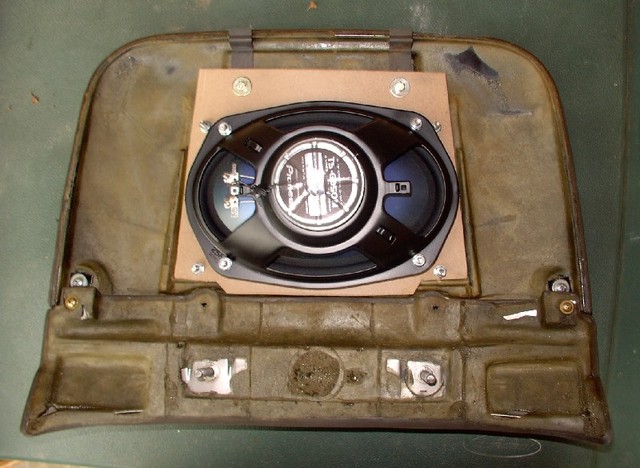
Modified (without center part) original speaker pod screwed on top of MDF plate:
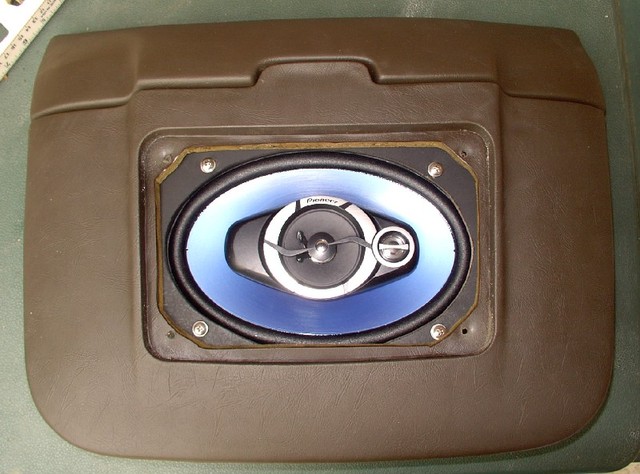
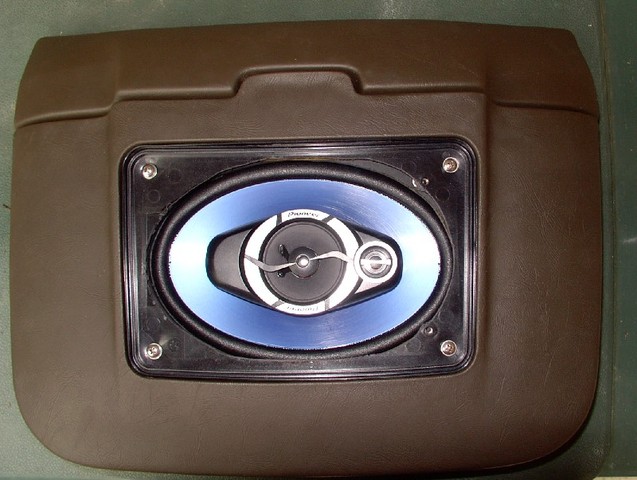
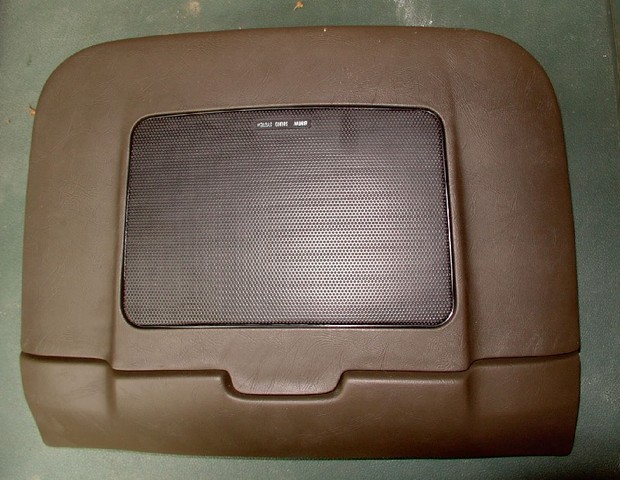
Original clip put back:
Re: '86 Canadian Bronzit-Beige
Posted: Mon Jun 05, 2017 2:12 am
by baders
Nice work Val. I have yet to power up my Roland digital gauges but they have been installed in the pod. I look to mount the gauge processor in the position of the old auto box DME if it will fit there. Will probably be upgrading the rear deck speakers as well to complement the Harmon 4x6" plate components in the front.
Re: '86 Canadian Bronzit-Beige
Posted: Mon Jun 05, 2017 3:25 pm
by GRNSHRK
Ditto, lookin' good Val

You should have considered adding the second under-hood light while you were in there routing the new windshield wash plumbing

I realize that mine is more simple since I didn't have to deal with the intensive wash system, but I like the more "complete" look better

Keep the stories comin'


Re: '86 Canadian Bronzit-Beige
Posted: Mon Jun 05, 2017 4:19 pm
by val_c
Bobbo:
This washer tubing install looks clean.
I will tackle underhood lights when I'l work on insulation. The one I have now doesn't work either, I suspect bad wiring.
Re: Digital gauges installation.
Posted: Wed Jun 07, 2017 8:07 pm
by dwcains
Val_C wrote:
Instrument cluster installed and test drive done. It's alive!
Just started, engine is cold:

After a few minutes of driving:

Does your car have the factory oil cooler? If so, how did you install the senders for the oil press/temp?
Re: '86 Canadian Bronzit-Beige
Posted: Wed Jun 07, 2017 11:50 pm
by val_c
Dean, my car doesn't have cooler.
I've used
this instruction to install senders. Pressure sender can be installed using adapter on the block near firewall where pressure switch is. You can replace pressure switch with pressure sender with double connectors to retain warning lights and connect pressure gauge. I believe Roland provided type of senders to use with his instructions.
For the temperature I've drilled and tapped oil filter housing as per instruction linked.
I've seen people replace oil drain plug with
temperature sender too.
Re: '86 Canadian Bronzit-Beige
Posted: Thu Jun 08, 2017 5:22 am
by dwcains
Thanks for the info. Tapping that oil filter housing doesn't thrill me, as it looks like a PITA to remove, and if it cracks, a replacement will not be easy to source. Maybe the drain plug is the way to go for the temp?
Re: '86 Canadian Bronzit-Beige
Posted: Thu Jun 08, 2017 12:52 pm
by val_c
*double post please delete*
Re: '86 Canadian Bronzit-Beige
Posted: Thu Jun 08, 2017 12:54 pm
by val_c
Temp sender as a drain plug seems to be easiest and simple solution, if you're OK with the wire that should be disconnected/connected during oil changes. It takes female spade connector so shouldn't be an issue, but if it's not you who is doing the oil change, then this person should be warned.
Drilling and tapping oil filter housing is not that bad, although I have to admit that walls are pretty thin. To minimize possibility to crack the wall, boss is installed first and then you'll screw temp sender into the boss.
Both ways will work, if you can find a spare oil filter housing to play with, it will be much easier.
Re: '86 Canadian Bronzit-Beige
Posted: Thu Jun 08, 2017 3:15 pm
by GRNSHRK
Dean, have to agree with Val on this one

I've never thought that the drain plug was a good location for the oil temp sensor, with the sending wire hanging down about as low as you can get

Here's what I did, and you can see that the oil filter mount is actually a decent location for the sender

Once again, nice job Val
Re: '86 Canadian Bronzit-Beige
Posted: Thu Jun 08, 2017 6:43 pm
by dwcains
The oil cooler filter housing is quite different, but I found this pic on the net showing a possible solution for the temp sender (although this looks like an oil feed for a turbo):

Re: '86 Canadian Bronzit-Beige
Posted: Thu Jun 08, 2017 7:17 pm
by val_c
Yes, this should work.
Looks like a good place, the rest is the same, drill, tap, install boss, screw in temp sensor.
Re: '86 Canadian Bronzit-Beige
Posted: Sat Jun 10, 2017 1:47 pm
by dmac156
Where did you buy the digital guages? Those look great.
Re: '86 Canadian Bronzit-Beige
Posted: Sat Jun 10, 2017 4:08 pm
by dwcains
Re: '86 Canadian Bronzit-Beige
Posted: Sat Jun 10, 2017 5:12 pm
by val_c
dmac156 wrote:Where did you buy the digital guages? Those look great.
You can contact Roland directly, in one of the previous posts I put a link to the thread where he gave permission to publish his email.
He will respect GB prices depending of how many units you'll order. I put an order for 2 and he gave us discount. But even the full price is quite decent imo.